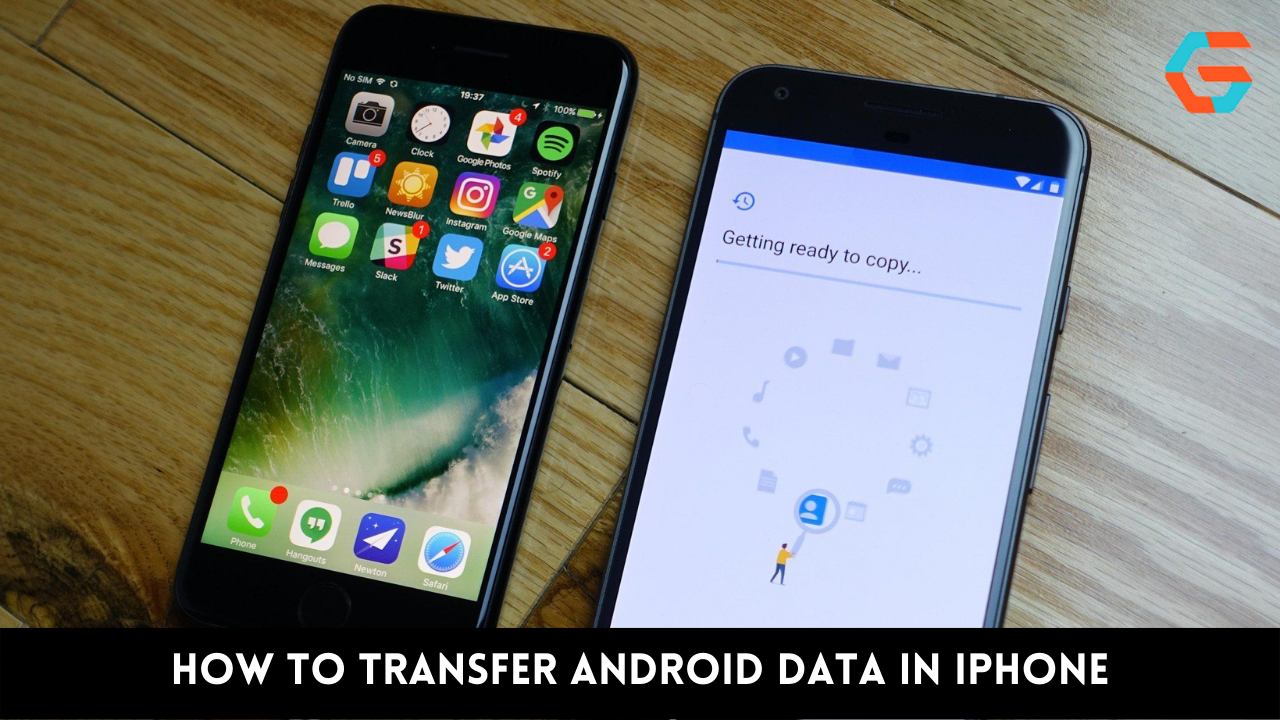
Need to move information from an Android device to an iOS device but don’t know how? This tutorial will show you how to quickly and easily transfer your data from an Android device to an iPhone. Apple iPads and iPhones up to and including iOS 16 are supported.
Since the operating systems of an Android phone and an iDevice are so dissimilar, transferring information from an Android device to an iOS device is not a simple process. So, how does one go about making the switch from Android to iOS on an iPhone?
In this post, we’ve included a few simple tools that will facilitate a painless transition of your data, such as contacts, from Android to iPhone. You can try out a few of these approaches until you find one that works best for you.
1. Transfer Android Data to iPhone with Move to iOS
Apple has created an app called Move to iOS to assist consumers who have made the transition from an Android handset to an iPhone, just as Samsung’s Smart Switch assists users in making the switch to Galaxy devices.
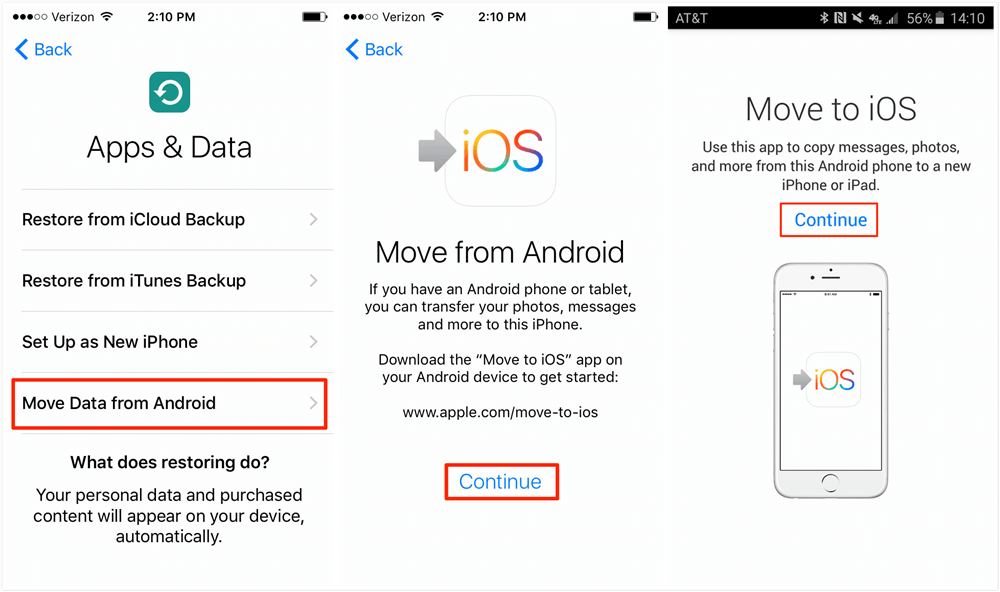
Others, however, have noted that it is a time-consuming process that doesn’t always yield the desired results. If you ever find yourself in such a predicament, just try one of the alternative solutions outlined above. To begin with:
- Make sure you have Android version 4.0 or later on your phone.
- Everything from your contacts and messages to your images and videos shot with your camera, your email, and your calendar can be moved over to an iOS device.
- The paid apps the user has been using on Android will be added to their iTunes wish list, while the free ones will be suggested as downloads on the App Store.
- A previously configured iPhone can be reset by going to Settings > General > Reset > Erase All Content and Settings.
Now, let’s check how to switch from Android to iPhone with Move to iOS:

- Get as far as the “Apps & Data” screen in the iPhone setup.
- Select “Move Data from Android” from the menu.
- Select “Google Play Store” from your Android device’s menu.
- Launch the Move to iOS app after it has been downloaded and installed.
- The “Continue” button must be tapped on both the Android and iPhone to proceed.
- In order to proceed, select “Agree” and then “Next” on your Android device.
- Put in the 12-digit or 10-digit code shown on your iPhone to access the Android app.
- Then, your Android device will establish a secure Wi-Fi connection between your iPhone and your computer.
- In Android, you may pick and choose which files to move.
- To begin transferring information from Android to iPhone, select the “Next” option.
- When you’re finished, select “Done” on your Android device.
- Then, on your iOS device, select “Continue.”
- To set up and activate your iPhone or iPad, just follow the on-screen prompts.
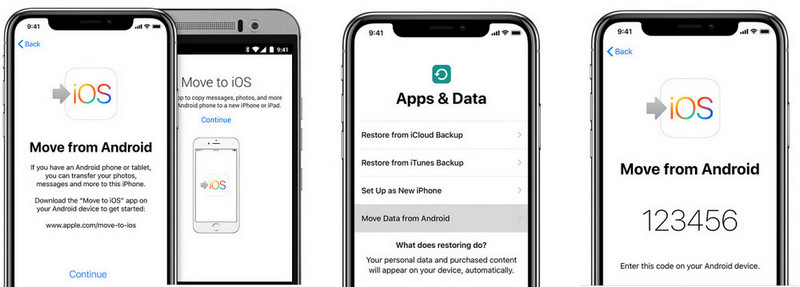
If you need to transfer a large amount of data, this approach could take a while. How quickly can information be moved from an Android device to an iPhone? The following procedure will facilitate a quick and painless transition from an Android to an iPhone. Let’s see if it really functions.
Read More: Top 4 Ways To Download YouTube Playlist in Android: A Step By Step Guide!
2. Transfer Data from Android to iPhone without Moving to iOS
If you’re having trouble transferring data from Android to iPhone because of issues with Move to iOS, you may want to check out Move to iOS Alternatives. A trustworthy alternative, on the other hand, shouldn’t have any problems like that. Two options are shown below.
1. Move to iOS Alternative – AnyTrans
Some file formats are incompatible with the “Move to iOS” service. The majority of users report that they were unable to successfully transfer images and other files when using the “Transfer to iOS” feature. Many people want to transfer their Android data to an iPhone, therefore they look for alternative methods.
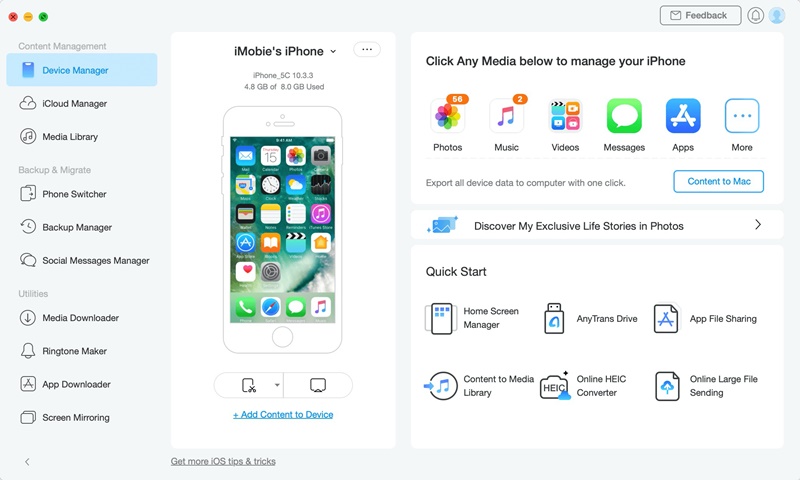
You only need one professional data transfer program, AnyTrans, to make the switch from Android to iOS. The following are some of its most notable characteristics with regard to transferring data from Android to iPhone. If you want to simply move your Android data to your new iPhone, download AnyTrans on your computer now and then follow the steps below.
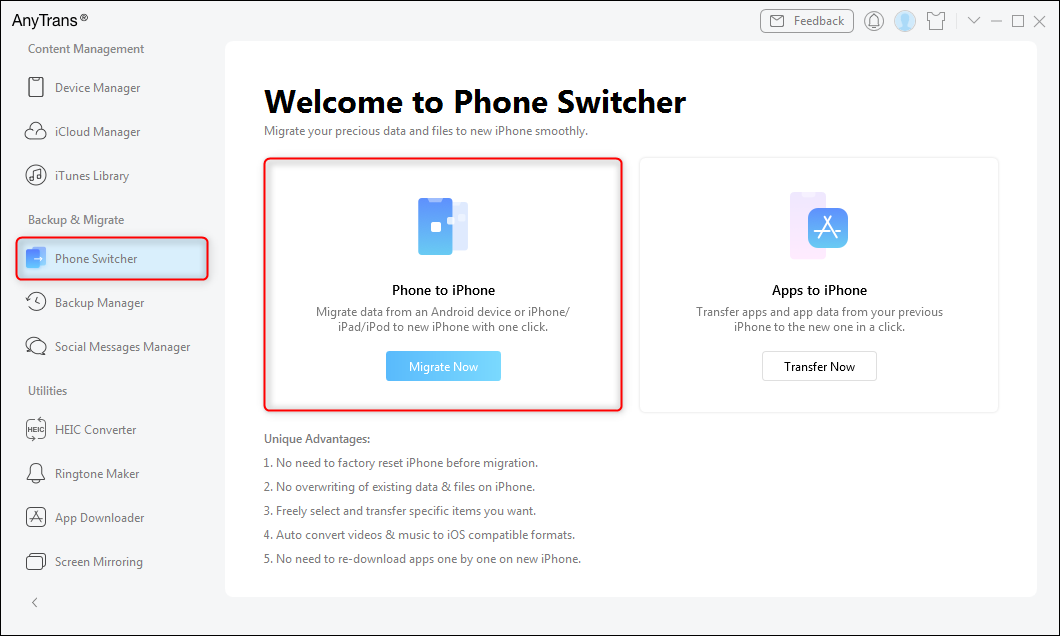
Step 1: Get AnyTrans going on your PC > Join your Android and Apple device to your computer via USB cords > In the menu on the left, click “Phone Switcher” > To use the iPhone to iPhone mode, select it.
Step 2: Choose the device you want to send data from and the device you want to receive it on, then click “Next.”
Step 3: To begin copying data from your Android device to your iPhone, tap the “Next” button. The default is to verify all file types that may be verified.
2. Move to iOS Alternative – PhoneTrans
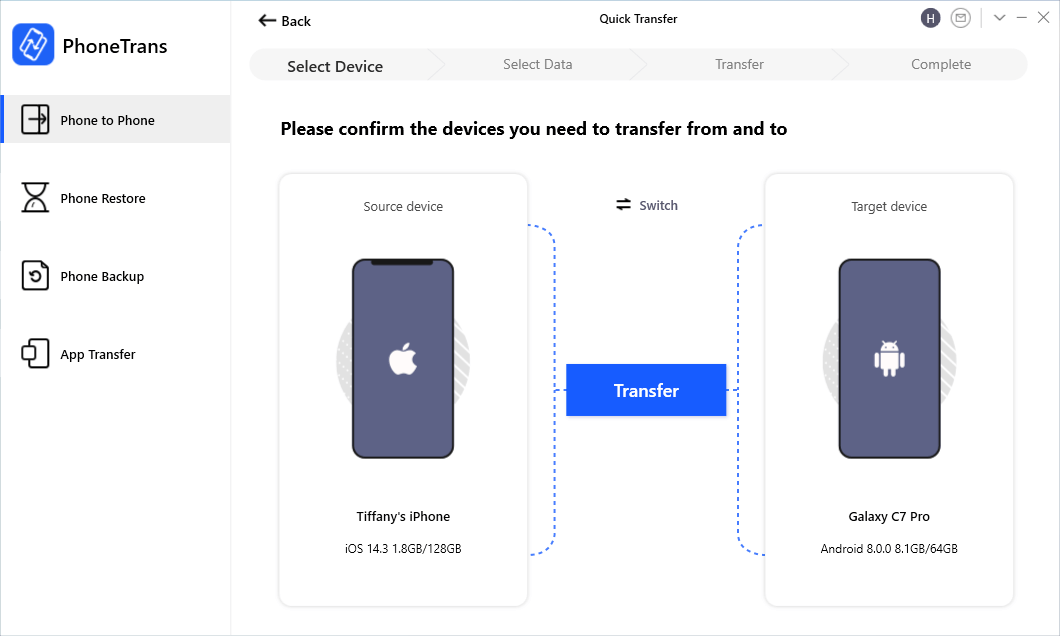
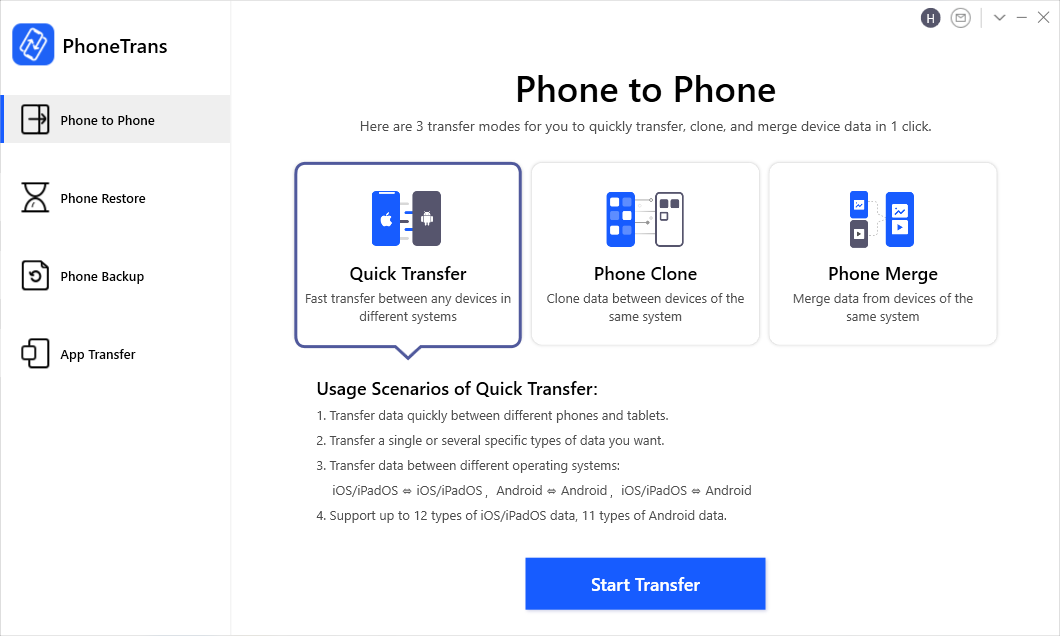
PhoneTrans is a reliable solution for transferring data across mobile devices. As well as backing up your Android or iPhone to your computer, it allows you to move data between Android devices and between the iPhone and Android. PhoneTrans’s three transfer modes—Quick Transfer, Phone Clone, and Phone Merge—are flexible enough to accommodate every possible situation involving a phone swap. Consider its benefits:
- The Quick Trans allows you to quickly and easily move whatever data you need from Android to iPhone.
- Everything from your Android phone’s contacts to its text messages, phone book, photos, and more can be moved across to your iPhone with just a single click.
- You can transfer your data to a new device with confidence thanks to its backup and restore features.
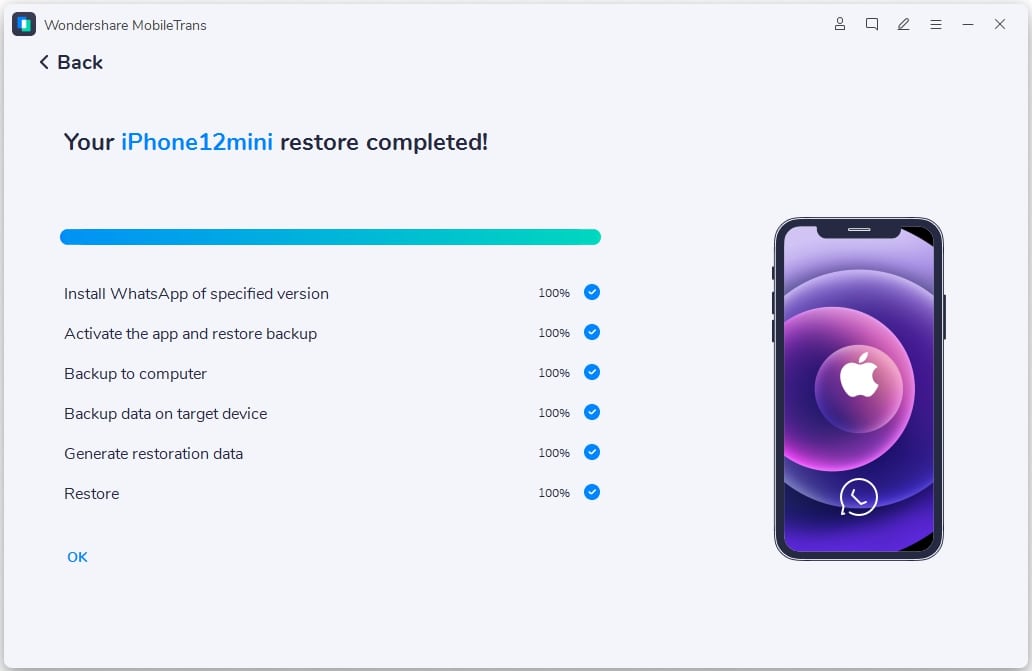
Step 1: The first step is to get PhoneTrans by clicking here and installing it on your PC. Select the Phone to Phone > Quick Transfer tab from the main screen.
Step 2: Then, hook up your Android and iPhone to the PC > You can use an Android phone as the input and an iPhone as the output by selecting the appropriate options in the menus above. Use the ‘Transfer’ button to complete the transaction.
Step 3: Choose the files you wish to transfer, then hit the “Transfer Now” button.
Read More: 5 Easy Ways To Transfer Photos From iPhone To Laptop!
3. Sync Contacts/Mail/Calendars from Android to iPhone
Since the iPhone is compatible with a wide variety of email services, including Google, Exchange, Yahoo, and many others, you can check your inbox on the go and access the same contacts and calendar events as on your computer or another iOS device. Here, consider the email service Gmail.

On your Android phone:
- Go to “Settings”.
- Select your Gmail account.
- Tap “Sync Contacts/Mail/Calendars”.
- Tap “Sync Now”.
- the selected files will also be synced at the same time.
On your iPhone or iPad:
- Go to Settings.
- Tap Mail, Contacts, and Calendars (or Tap Accounts & Passwords).
- Choose Add Account.
- Choose Google Gmail.
- Enter your account info and Tap Next.
- Turn on Mail, Contacts, and Calendars sync option.

Facebook, Twitter, and Sina Weibo are just a few examples of social networking apps that allow users to store their contact information and calendars online and then sync that information with their iOS devices.
- First, download the app from the App Store.
- After you have installed them on the iPhone/iPad.
- Go to Settings and find Facebook, Twitter, or other social media apps.
- Sign in with your account
- Turn on Contacts and Calendar.
4. Sync Music/Photos/Videos to iPhone with iTunes
If you’re willing to put in the time and effort, this is one way to get media from an Android device onto an iOS device like an iPhone. You may get the most recent version of iTunes for your Mac or PC by clicking here. Keep in mind that if you have any content already stored on your iPhone or iPad, iTunes will remove it before transferring.
- Connect your Android phone to the computer.
- Copy the songs, photos, and videos you want to transfer to a new folder on the computer.
- You can install Android File Transfer on Mac or install AnyDroid on PC to help you make it.
- Disconnect your Android and plug it into your iPhone.
- Open iTunes.
Sync Music:
- Click on “File” and choose “Add Folder to Library”.
- Choose the folder you created before and transfer the music to the iTunes library.
- Click on the Device tab.
- Choose “Music”, then click on “Sync Music”.
- Choose the entire library or specific songs and click on “Apply”.
Read More: A Step-By-Step Guide To Update Graphics Driver in Windows 10!
Sync Photos and Videos:
- Click on “File” and choose “Add Folder to Library”.
- Choose the folder you created before and transfer the music to the iTunes library.
- Click the Device tab, then choose “Photos”.
- Click on the “Sync Photos” option.
- Select the folder you created before.
- Choose All folders and select include videos and click on Apply.
