The majority of external hard drives are Windows-compatible. Therefore, if you attempt to connect an external hard drive to a Mac, you may need to format the disc before to usage. This is how to accomplish it:
How to Format a Hard Drive for Mac
- Connect an external hard drive to your Mac. Some external hard drives need to be plugged into an outlet to work.
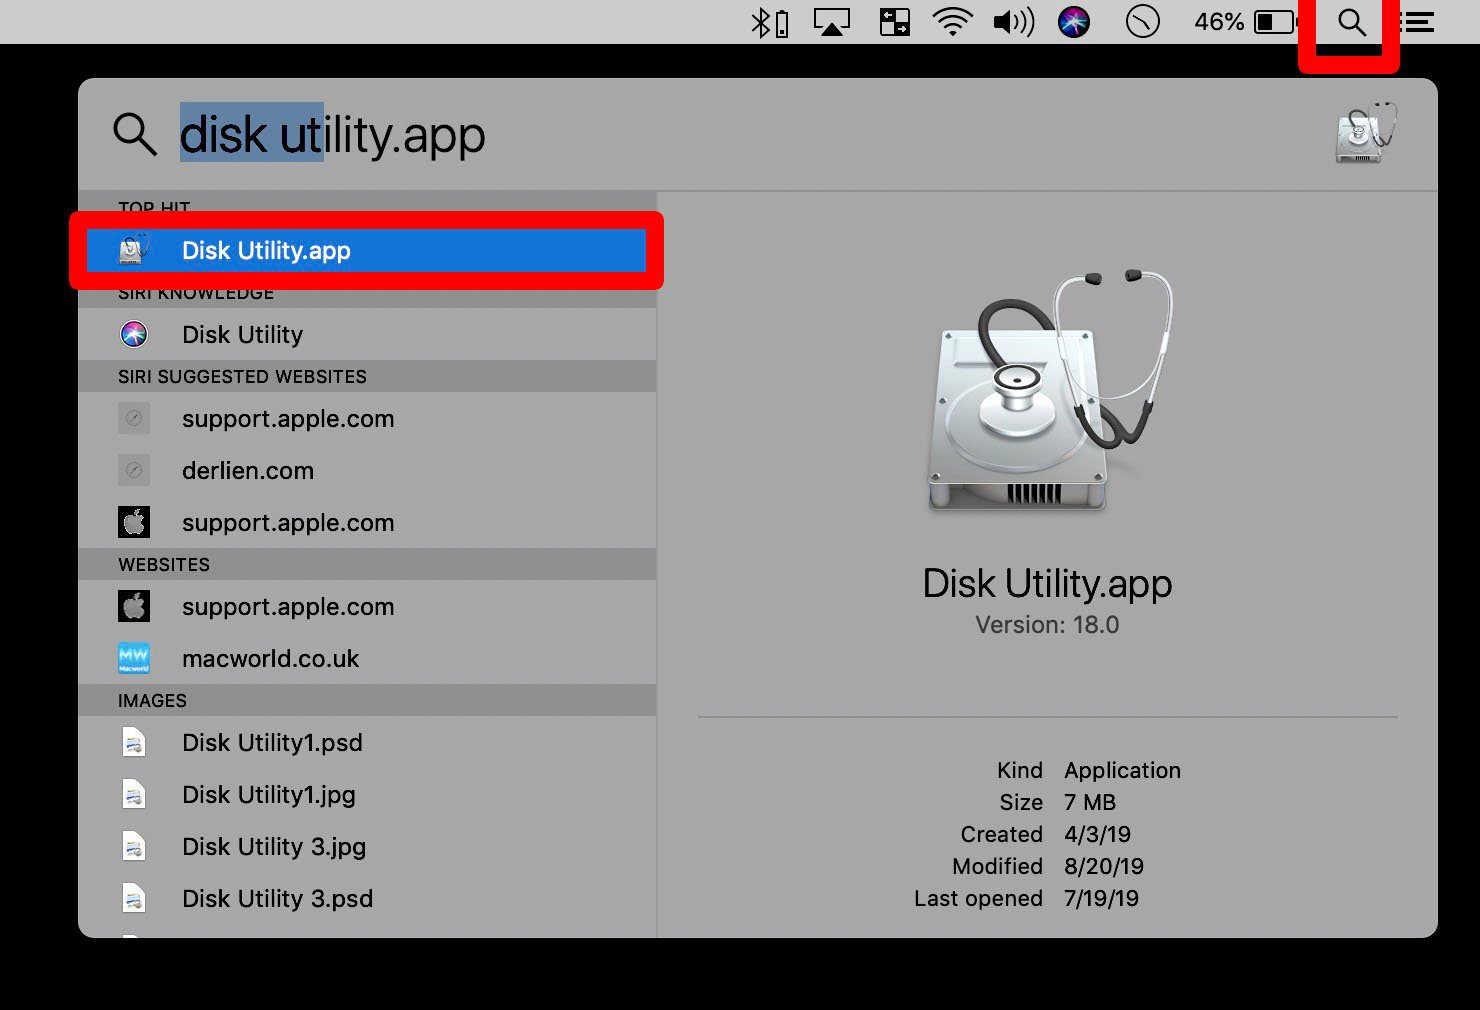
- Go to Spotlight Search, type in Disk Utility, and click the first option. This will open the Disk Utility app, where you will find all the internal and external drives that are connected to your Mac.
- Then click View in the top-left corner of the window and select Show All Devices.
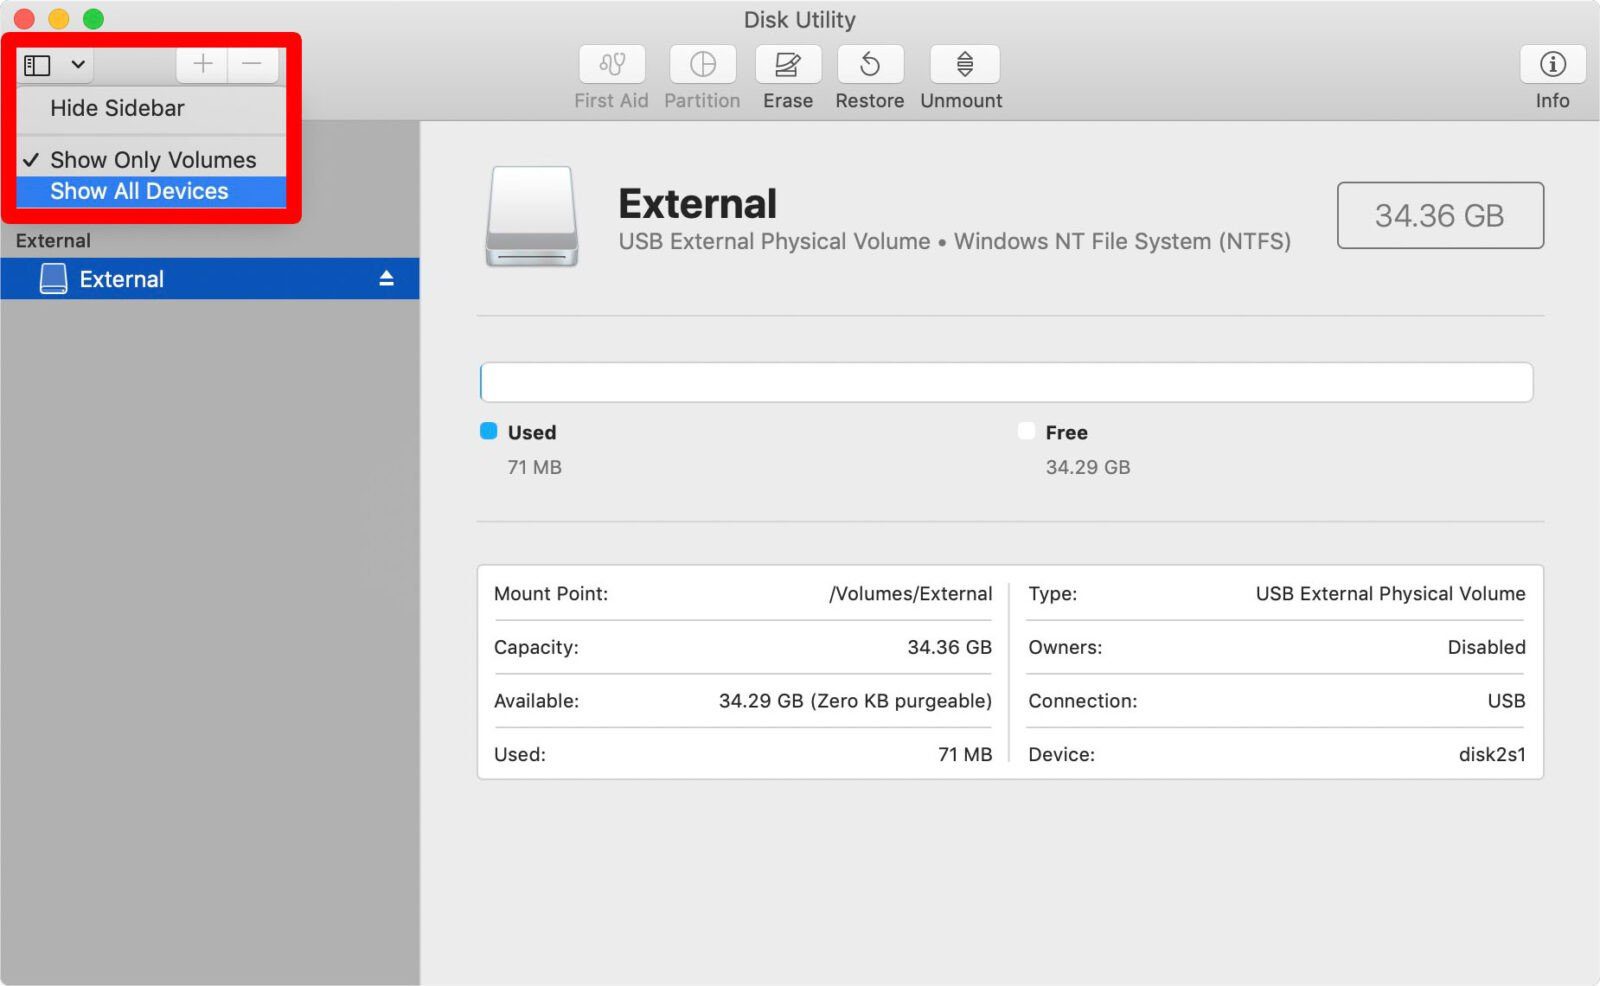
- Click the external hard drive you want to format. You can find this on the left-hand side of the screen under External Hard Drives. For the best result, select the disk (the highest option in the external tree).
- On the top menu, click Erase. This will open a small pop-up window with a warning that erasing the drive will delete all data stored on it and that it can’t be undone.
- Choose a name, format, and scheme for your drive. You can choose whatever name you want, and you should choose GUID Partition Map for the Scheme in most cases. However, you can choose between the following formats:
- Mac OS Extended (Journaled) is the best option for most Mac users since it is compatible with all Macs.
- APFS (Apple File System) is only for newer Macs running macOS 10.13 or later.
- exFAT is compatible with both PC and Mac.
- MS-DOS (FAT) is also compatible with Mac and PC, but you can only transfer files smaller than 4GB.
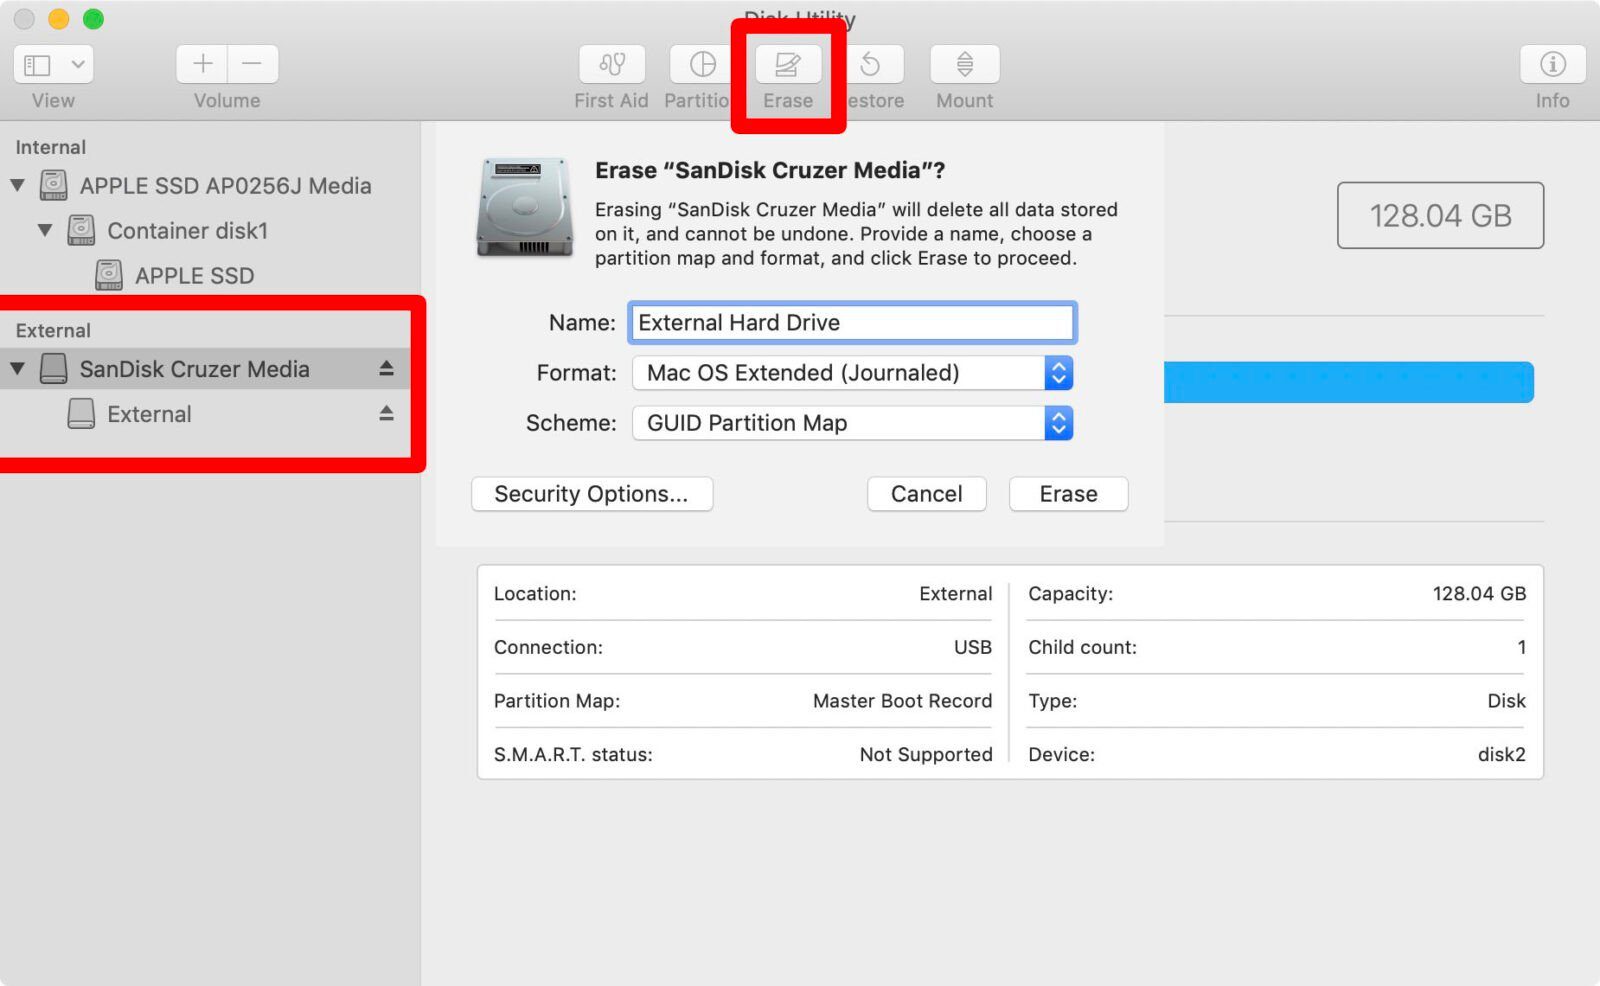
- When you’re done with providing the setup details, click Erase. This will immediately wipe the entire drive.
If you see the error message “Erase process has failed. Don’t be alarmed by the message “Click done to proceed;” This is due to Time Machine operating on your external hard disc.
You will have to disable Time Machine. This can be accomplished by accessing System Preferences and unchecking the “Back Up Automatically” box. Click Options next to “Show Time Machine in the menu bar.” This will launch a new window. Click Cancel to deactivate the Time Machine.
Also Read: Apple Delays AR Glasses Development Permanently: Report
How to Partition an External Hard Drive on Mac
After formatting your drive, you can partition it in order to divide it into two distinct formats. This is ideal for Mac and PC users who wish to move files between the two operating systems using an external drive. This is how to accomplish it:
- Open Disk Utility and select the drive that you want to partition. It is best to click View > Show All Devices so you can select the disk rather than a container.
- In the top menu, select Partition.
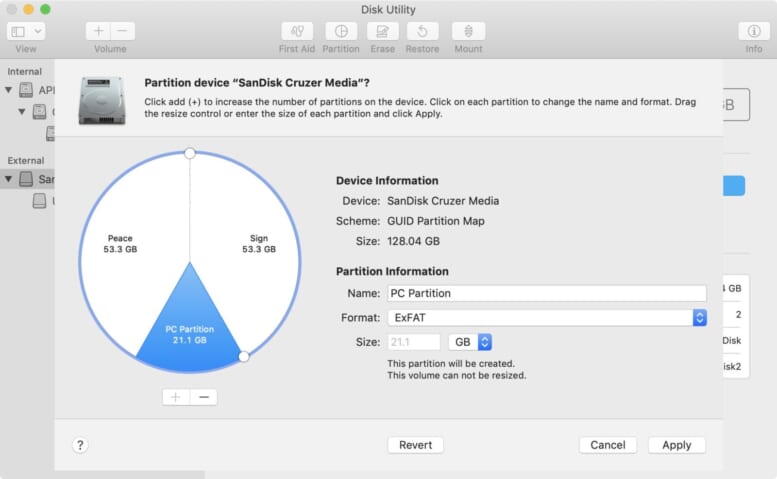
- Then click the plus sign at the bottom of the pie chart. Every time you click this plus sign, a new partition will be created.
- Choose a name, format and size for each partition. You can also change the size of each of the partitions by dragging the white dots at the edge of the circle.
- Finally click Apply.
Why Partition a Hard Drive?
The partitioning of an external hard drive enables the creation of distinct drives for Mac, PC, and other operating systems. No longer must you purchase hard drives for every computer you own.

A partition also provides dedicated space for Time Machine backup data or a bootable operating system backup. It also protects your data if your hard drive becomes infected with malware, as the infection would be contained behind a partition.
Now that you know how to format an external drive on a Mac, visit our blog to learn about the distinction between an HDD and an SDD.
