If you obtained a new email address or lost access to your old one, you may need to modify your Apple ID email. Here is the procedure.
If you obtain a new email address or lose access to an old one, you should change your Apple ID to maintain account security.
The changed email address will serve as your login for your iPhone, iPad, or Mac, in addition to Apple services such as iTunes, the App Store, and iCloud. Your account will remain the same (and any prior app and music purchases will be maintained), but it will now be associated with your new email address.
Without further ado, let’s examine how to modify the email address associated with your Apple ID.
How to Change Your Apple ID Email Using the Website
Sign out of any Apple device that is associated with your Apple ID before you begin. Ensure that you have an up-to-date iCloud backup so that you do not lose vital data like as contacts or other information.
- Head to appleid.apple.com on your iPhone, Mac, or PC and sign in with your present Apple ID and password. It’s easy to reset your Apple ID password if you can’t remember it.
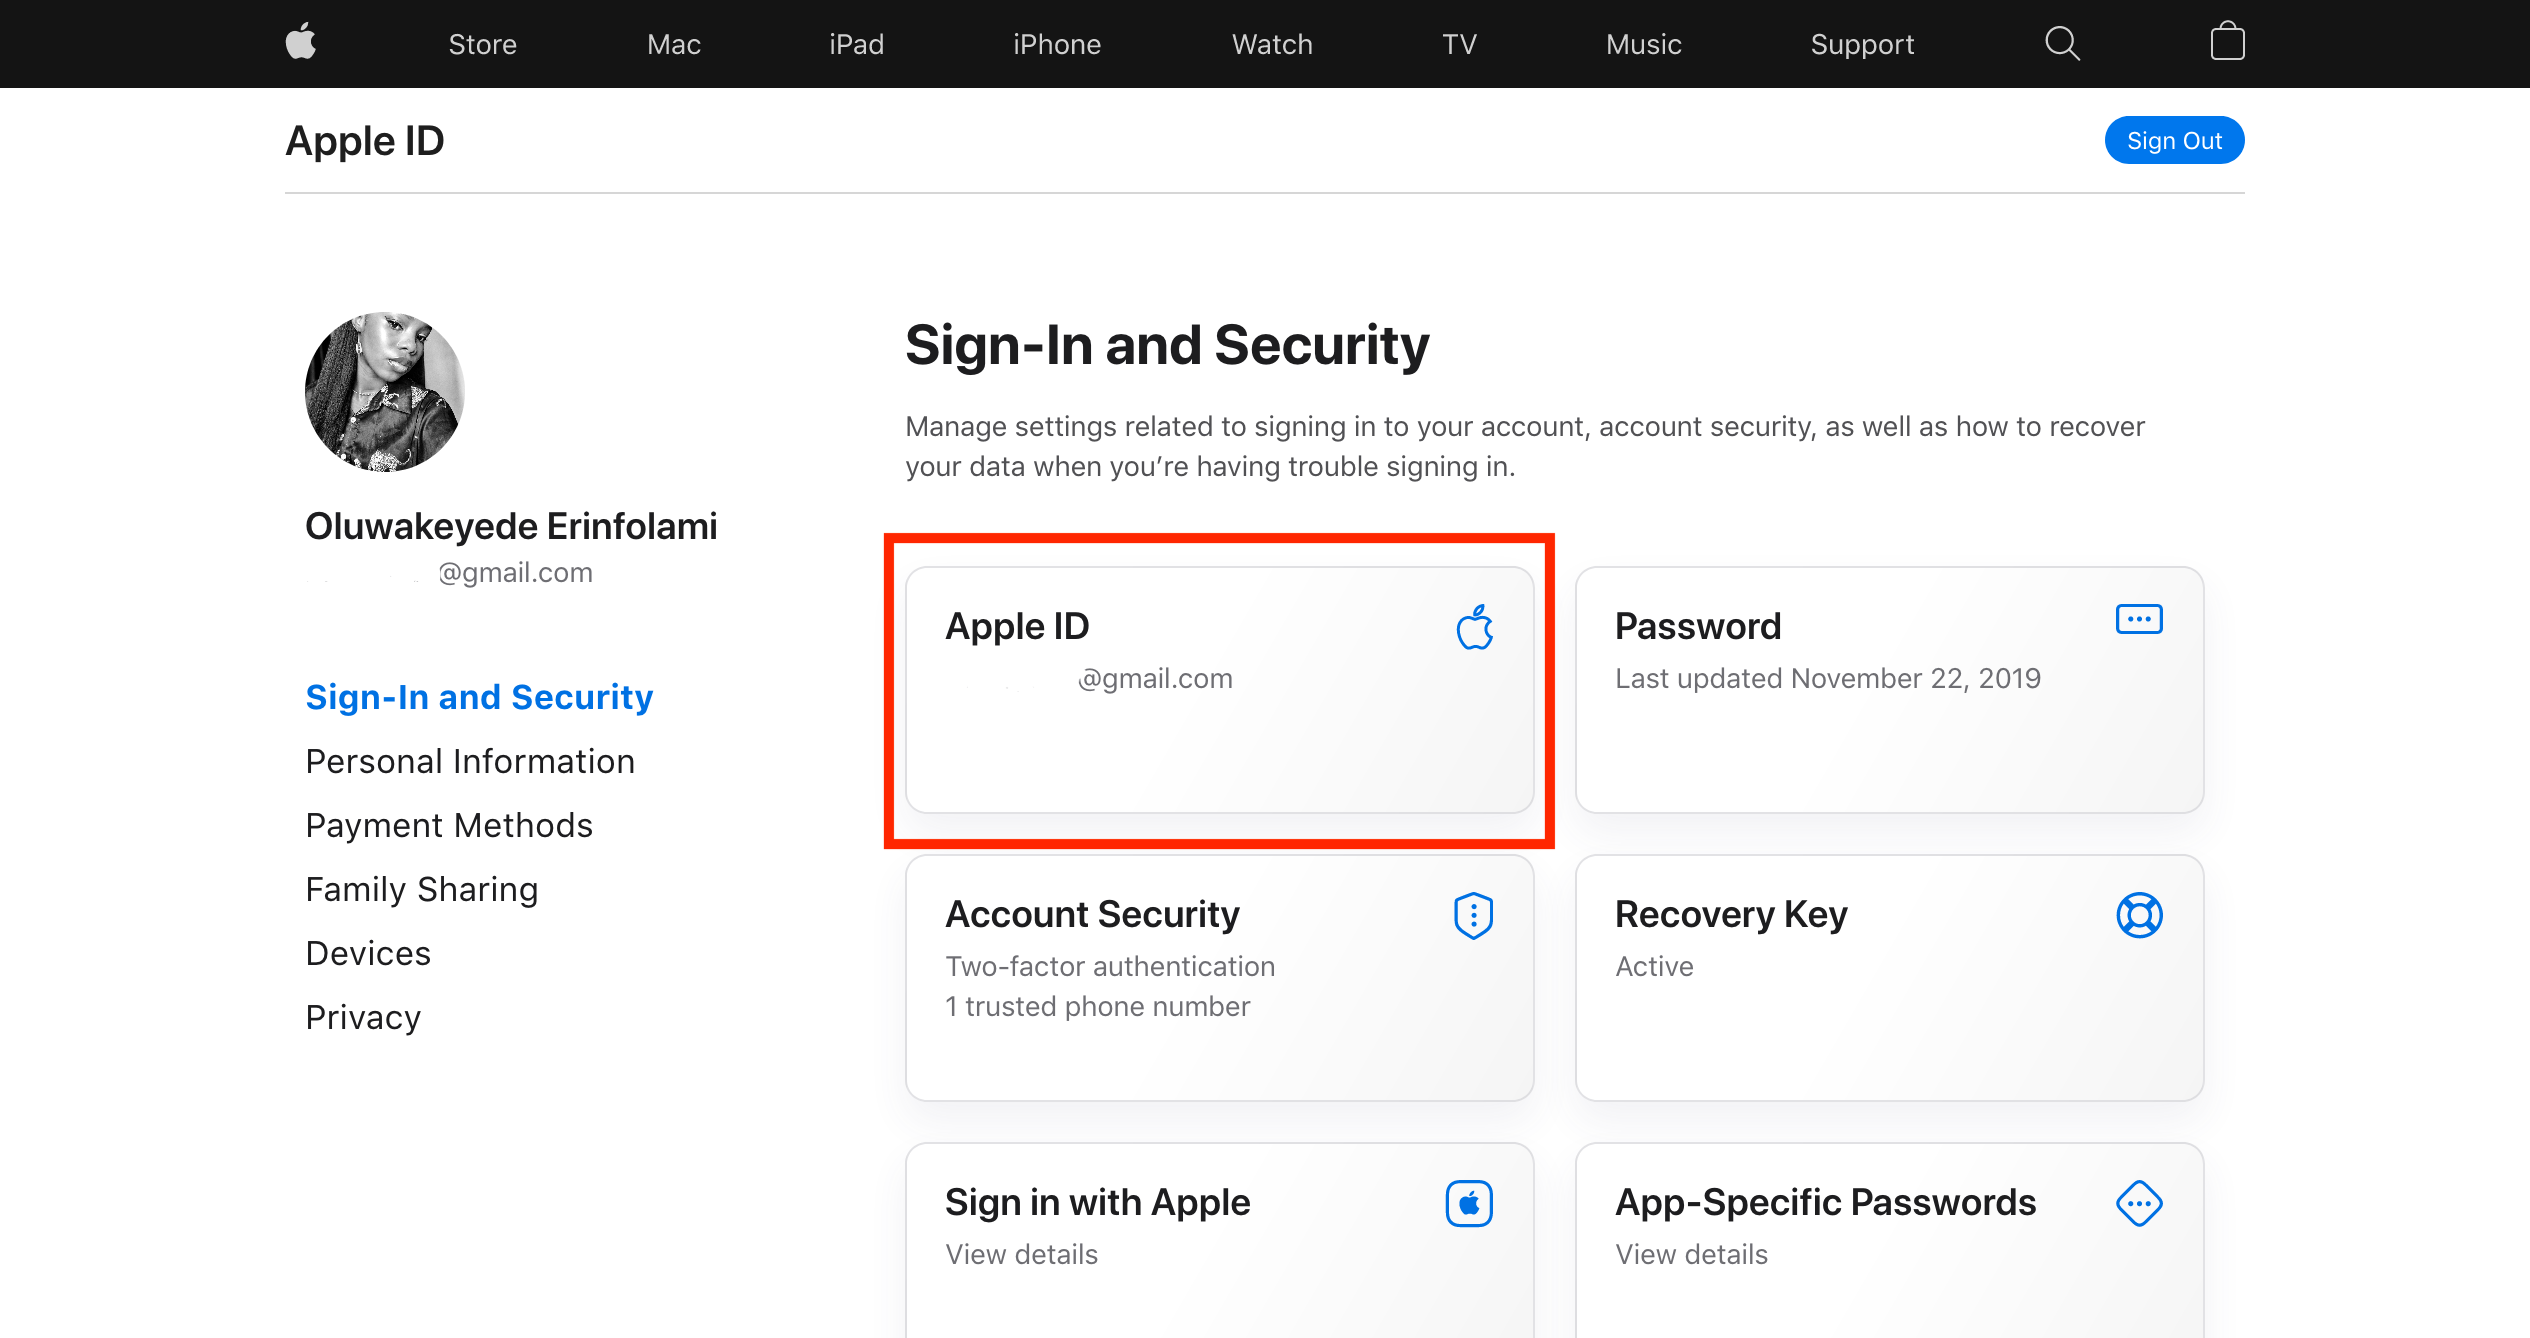
- The website will take you straight to the Sign-In and Security section. Click the Apple ID tab to continue.
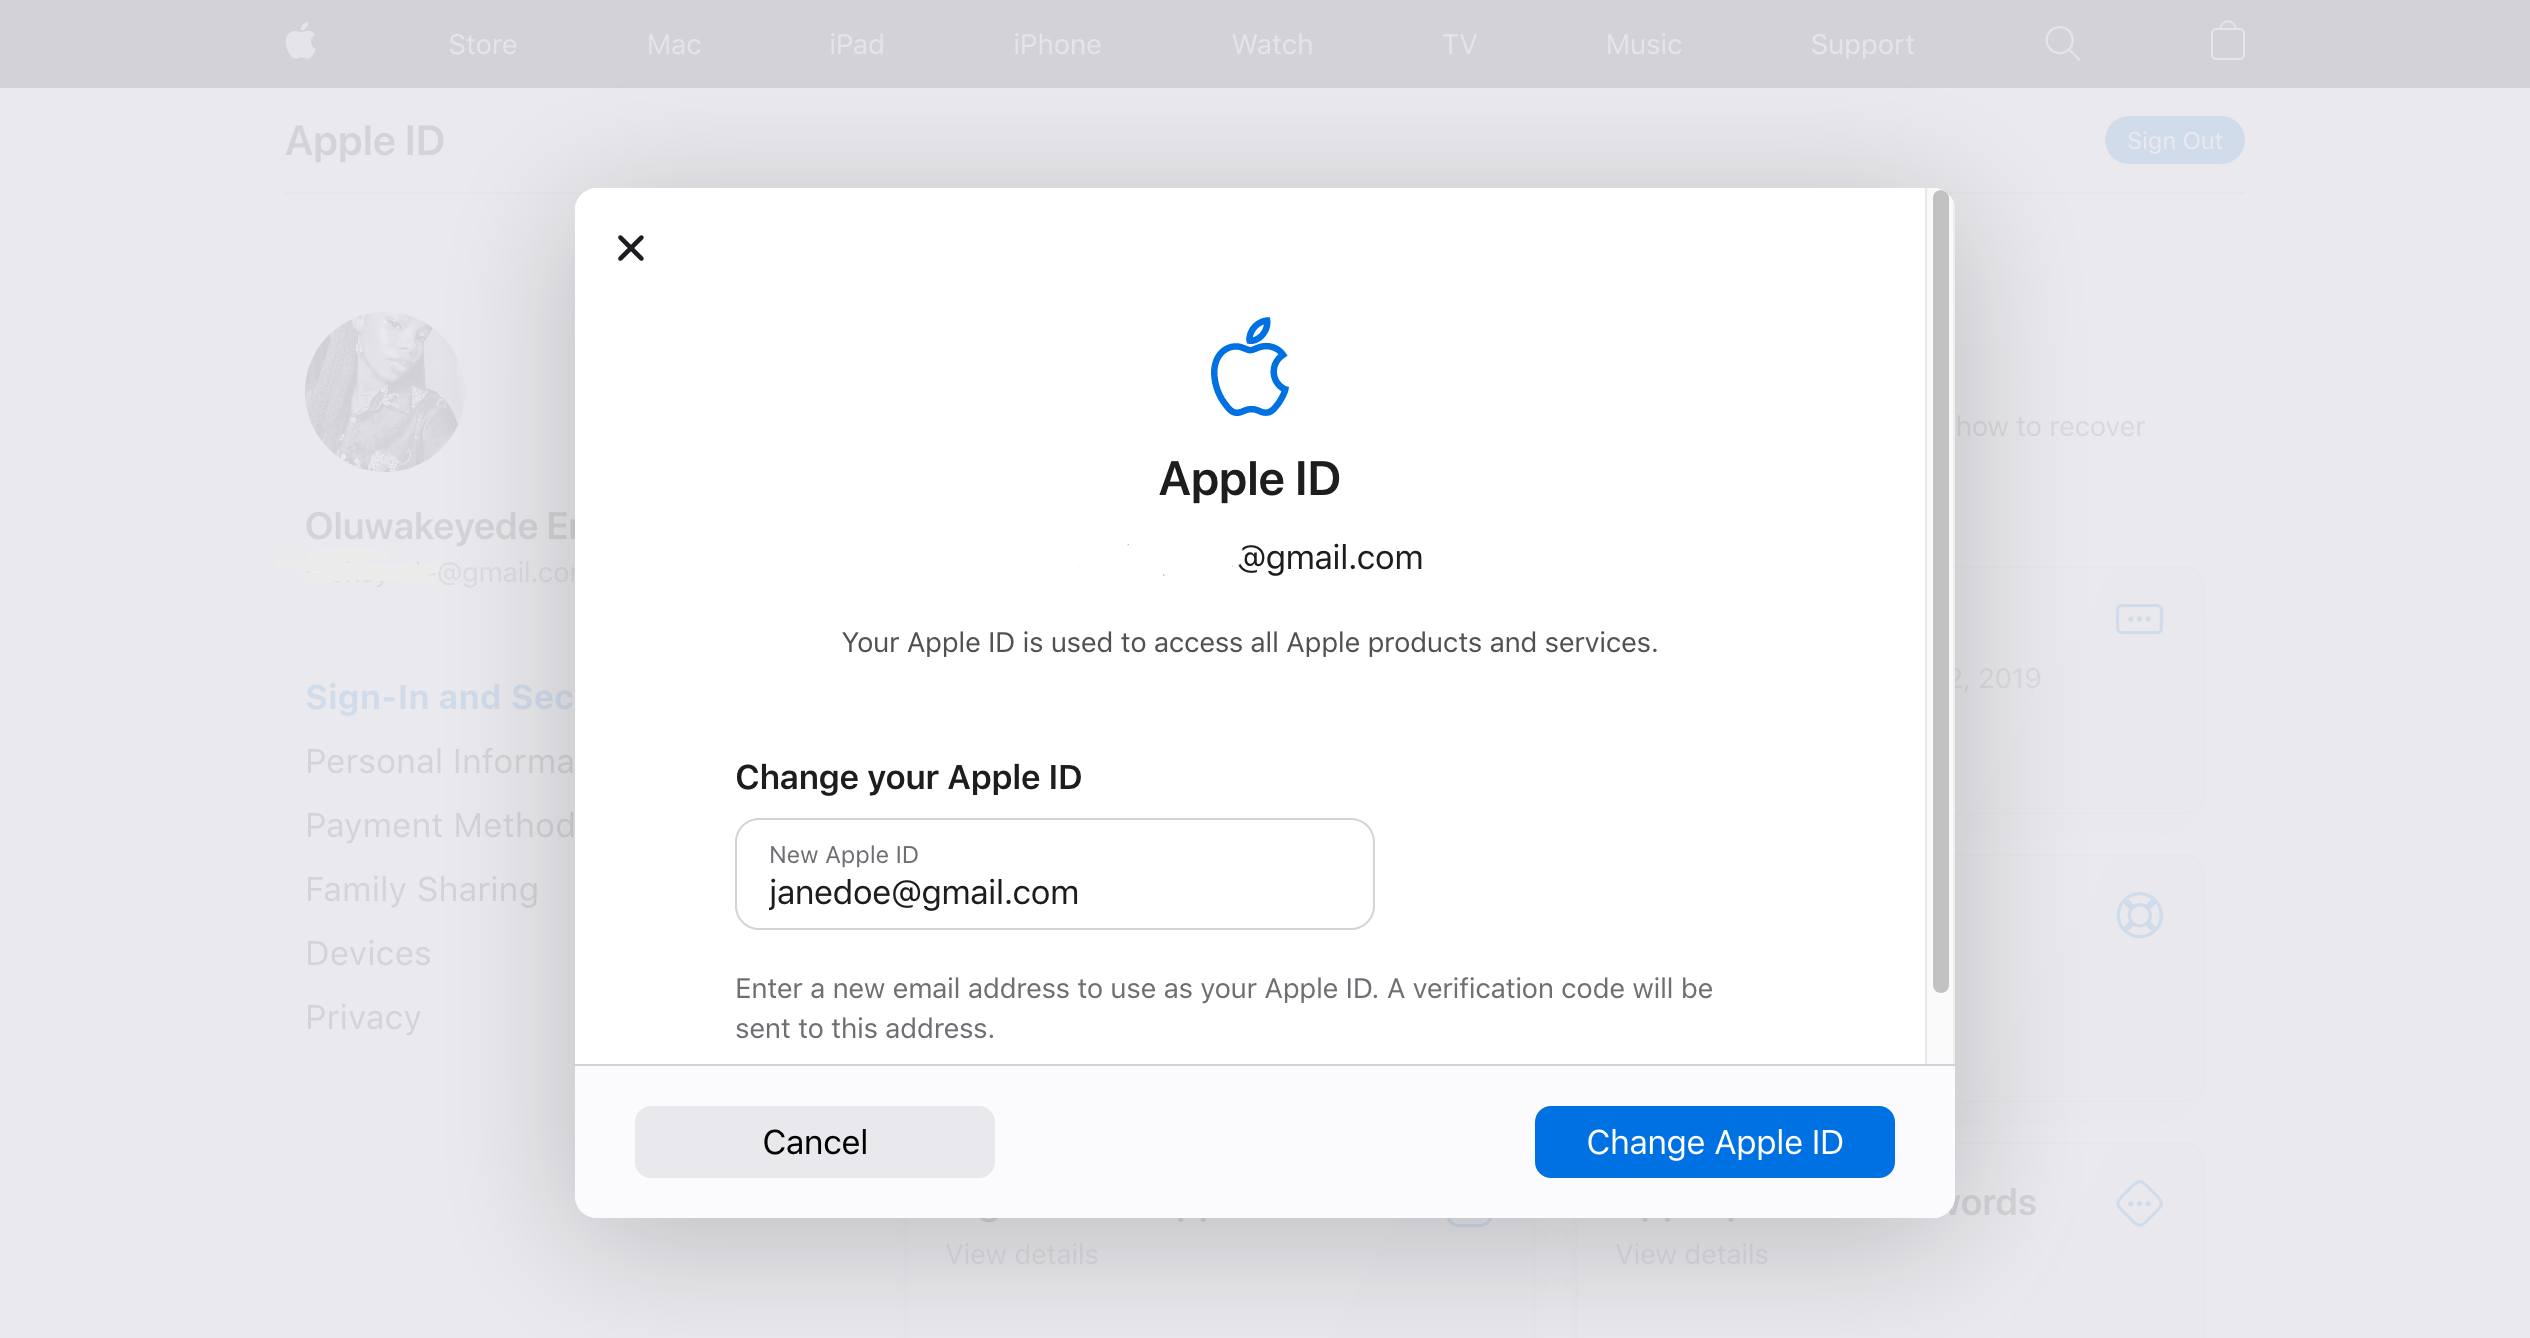
- Next, enter your new email address in the Change your Apple ID box that pops up. If the email address you entered isn’t available, it means another Apple user is using that email address. Unless the user disconnects that email from their account, you’ll have to use a different email address or create a new Apple ID
- Click Change Apple ID, and you’ll be asked to enter a verification code that was sent to your new email address. Look for it in your inbox and enter it into the blank boxes provided. If you can’t find the verification code, make sure you’re checking the right email. You could also search for the most recent email sent by [email protected].
- After entering the verification code, the dialog box will close, indicating that you have successfully changed your Apple ID email.
- Sign in to all your Apple devices and services with your new Apple ID. Please note that you can’t change an Apple ID within 30 days of the last change.
You’ll also need access to the email address associated with your Apple ID to verify the update, so you should double-check that you have the password for your email account.
Also, you can only modify Apple IDs that are non-Apple email addresses, such as @gmail.com, @hotmail.com, or @yahoo.com. If your Apple ID uses a proprietary domain, such as @icloud.com, @me.com, or @mac.com, you cannot modify it.
If you want to switch to a different Apple ID account, but not alter the email address associated with your Apple ID, you can sign out and then sign in with the new Apple ID.
Also Read: How to Turn Apple iMessage Read Receipts On and Off
How to Change Your Apple ID Email From Your iPhone Settings
You can also modify your Apple ID email address using the iPhone’s Settings menu. This is how:
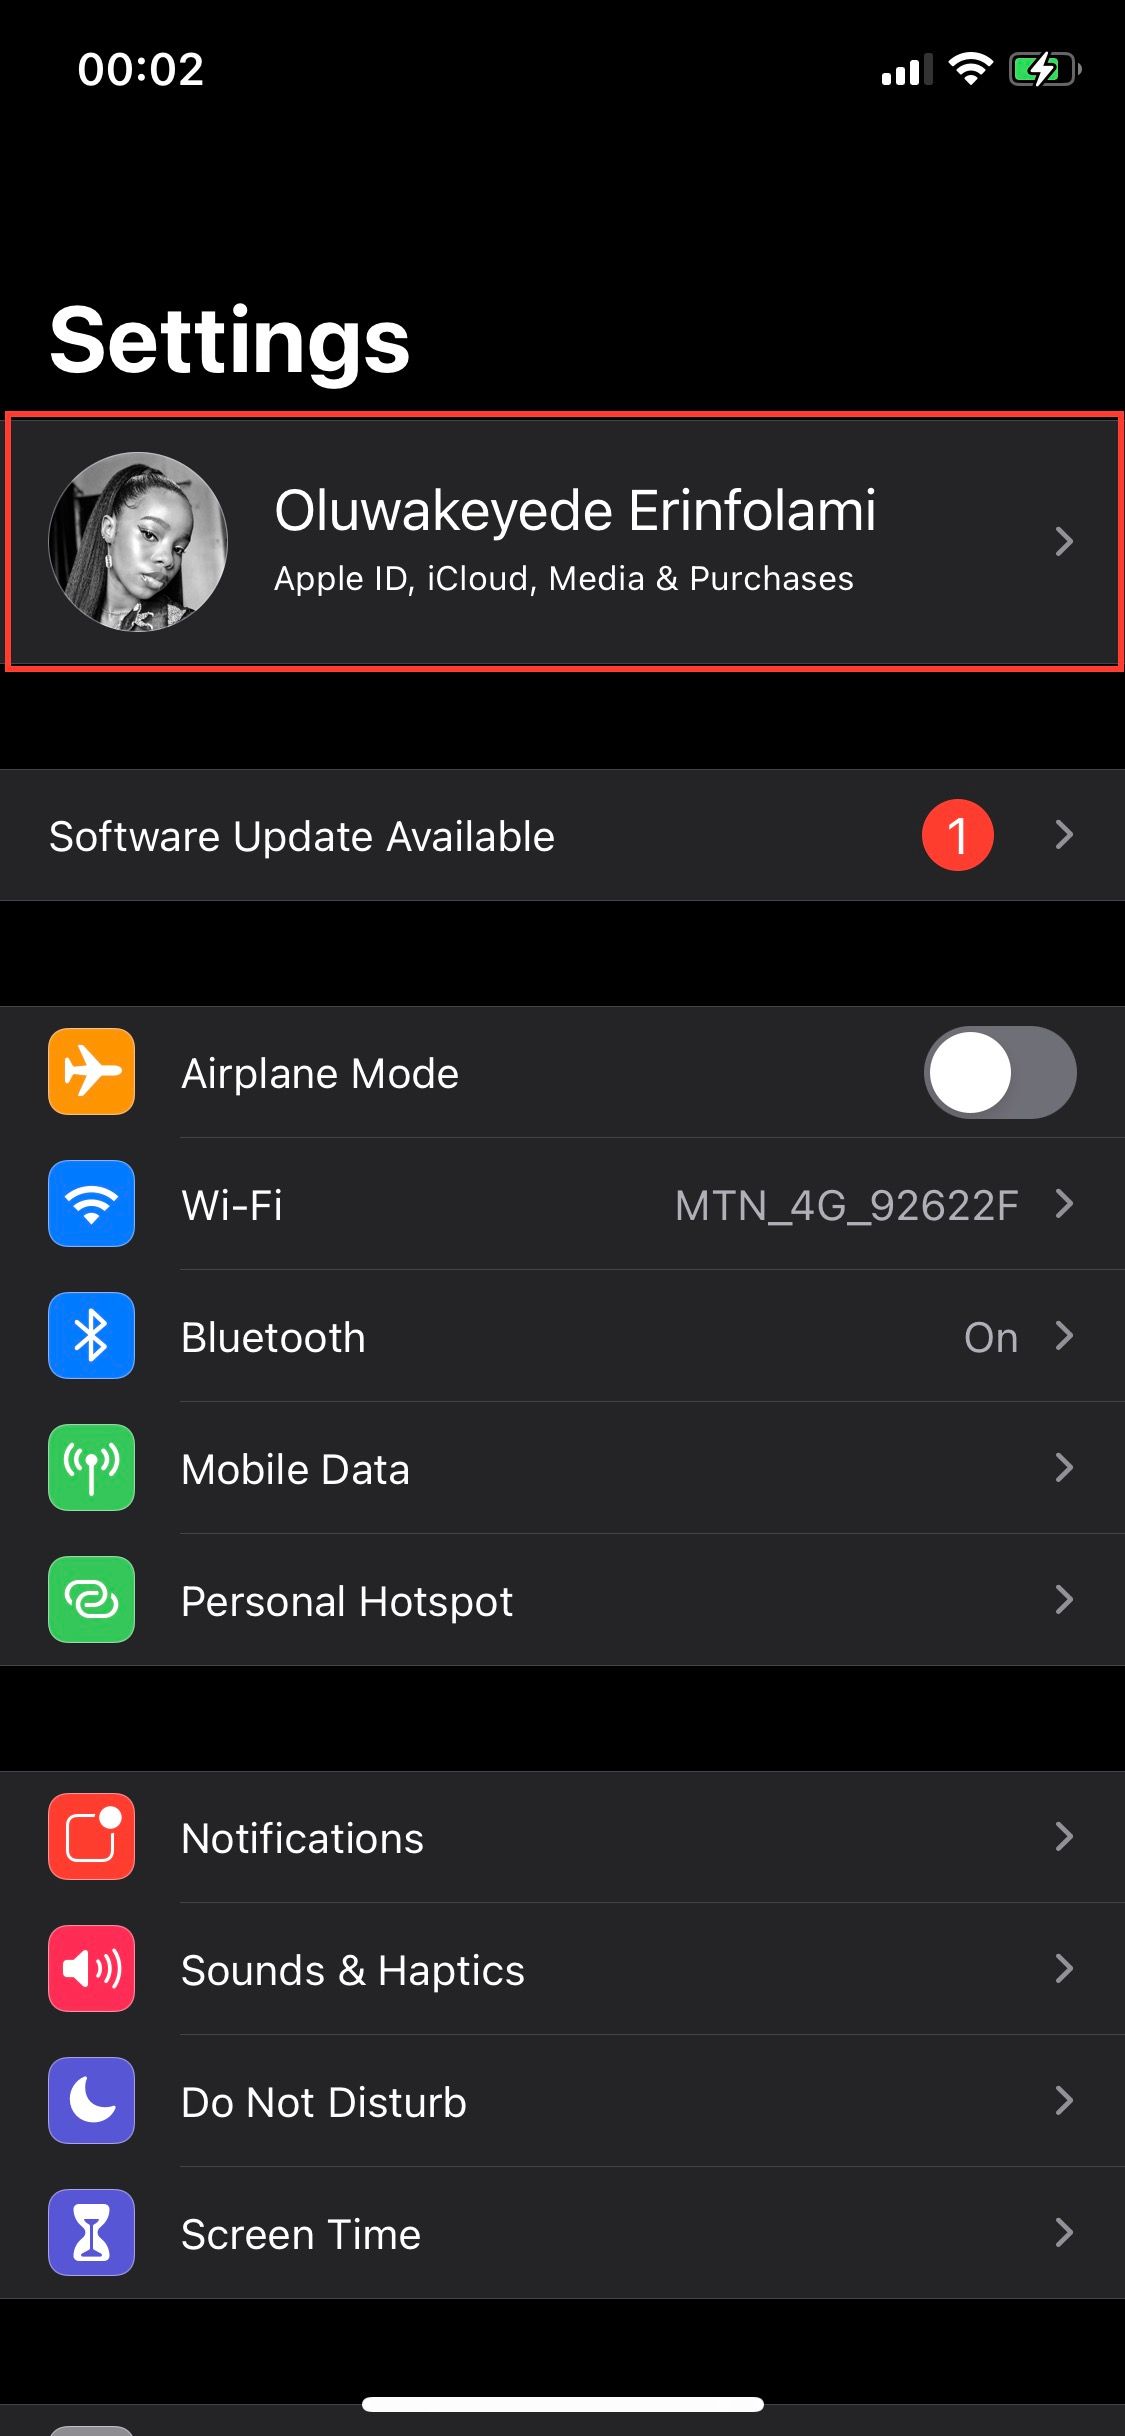
- Open the Settings app on your iPhone.
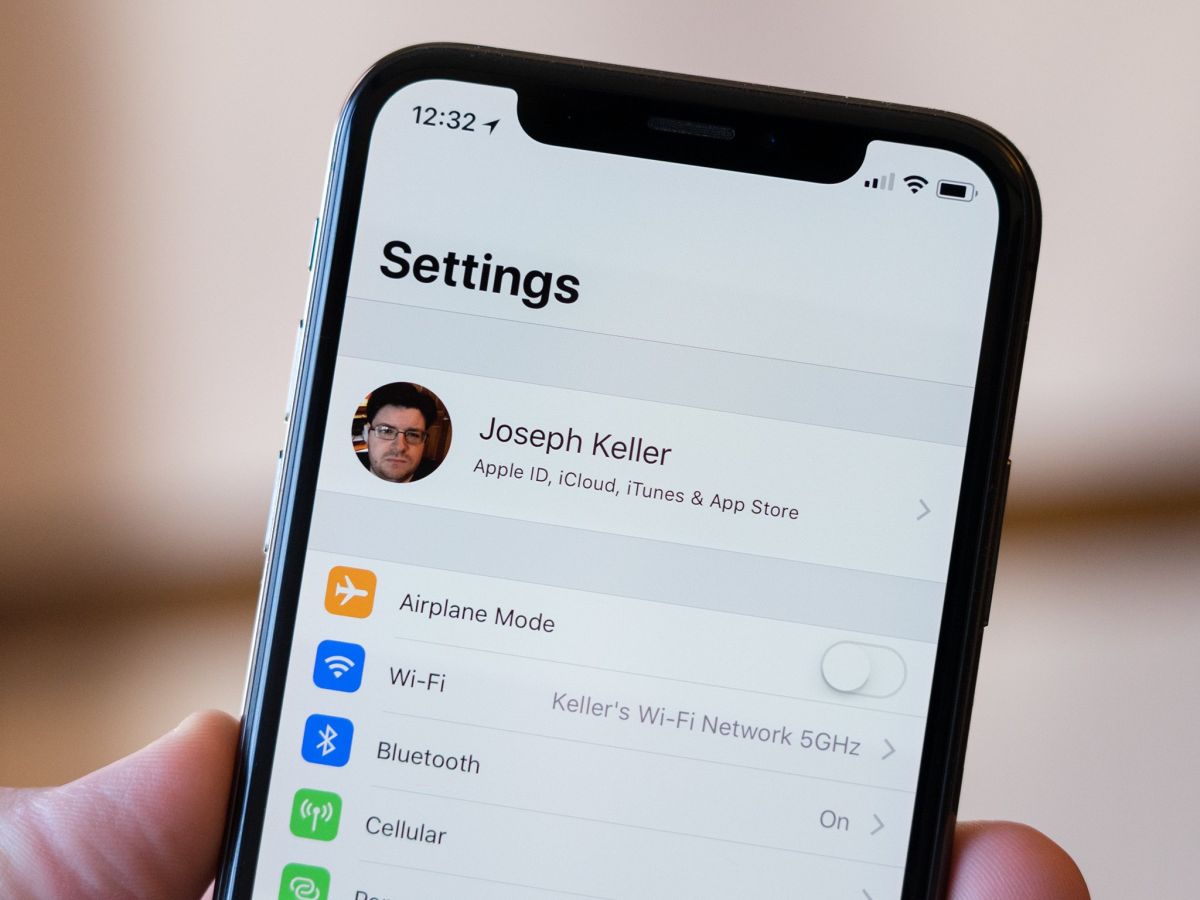
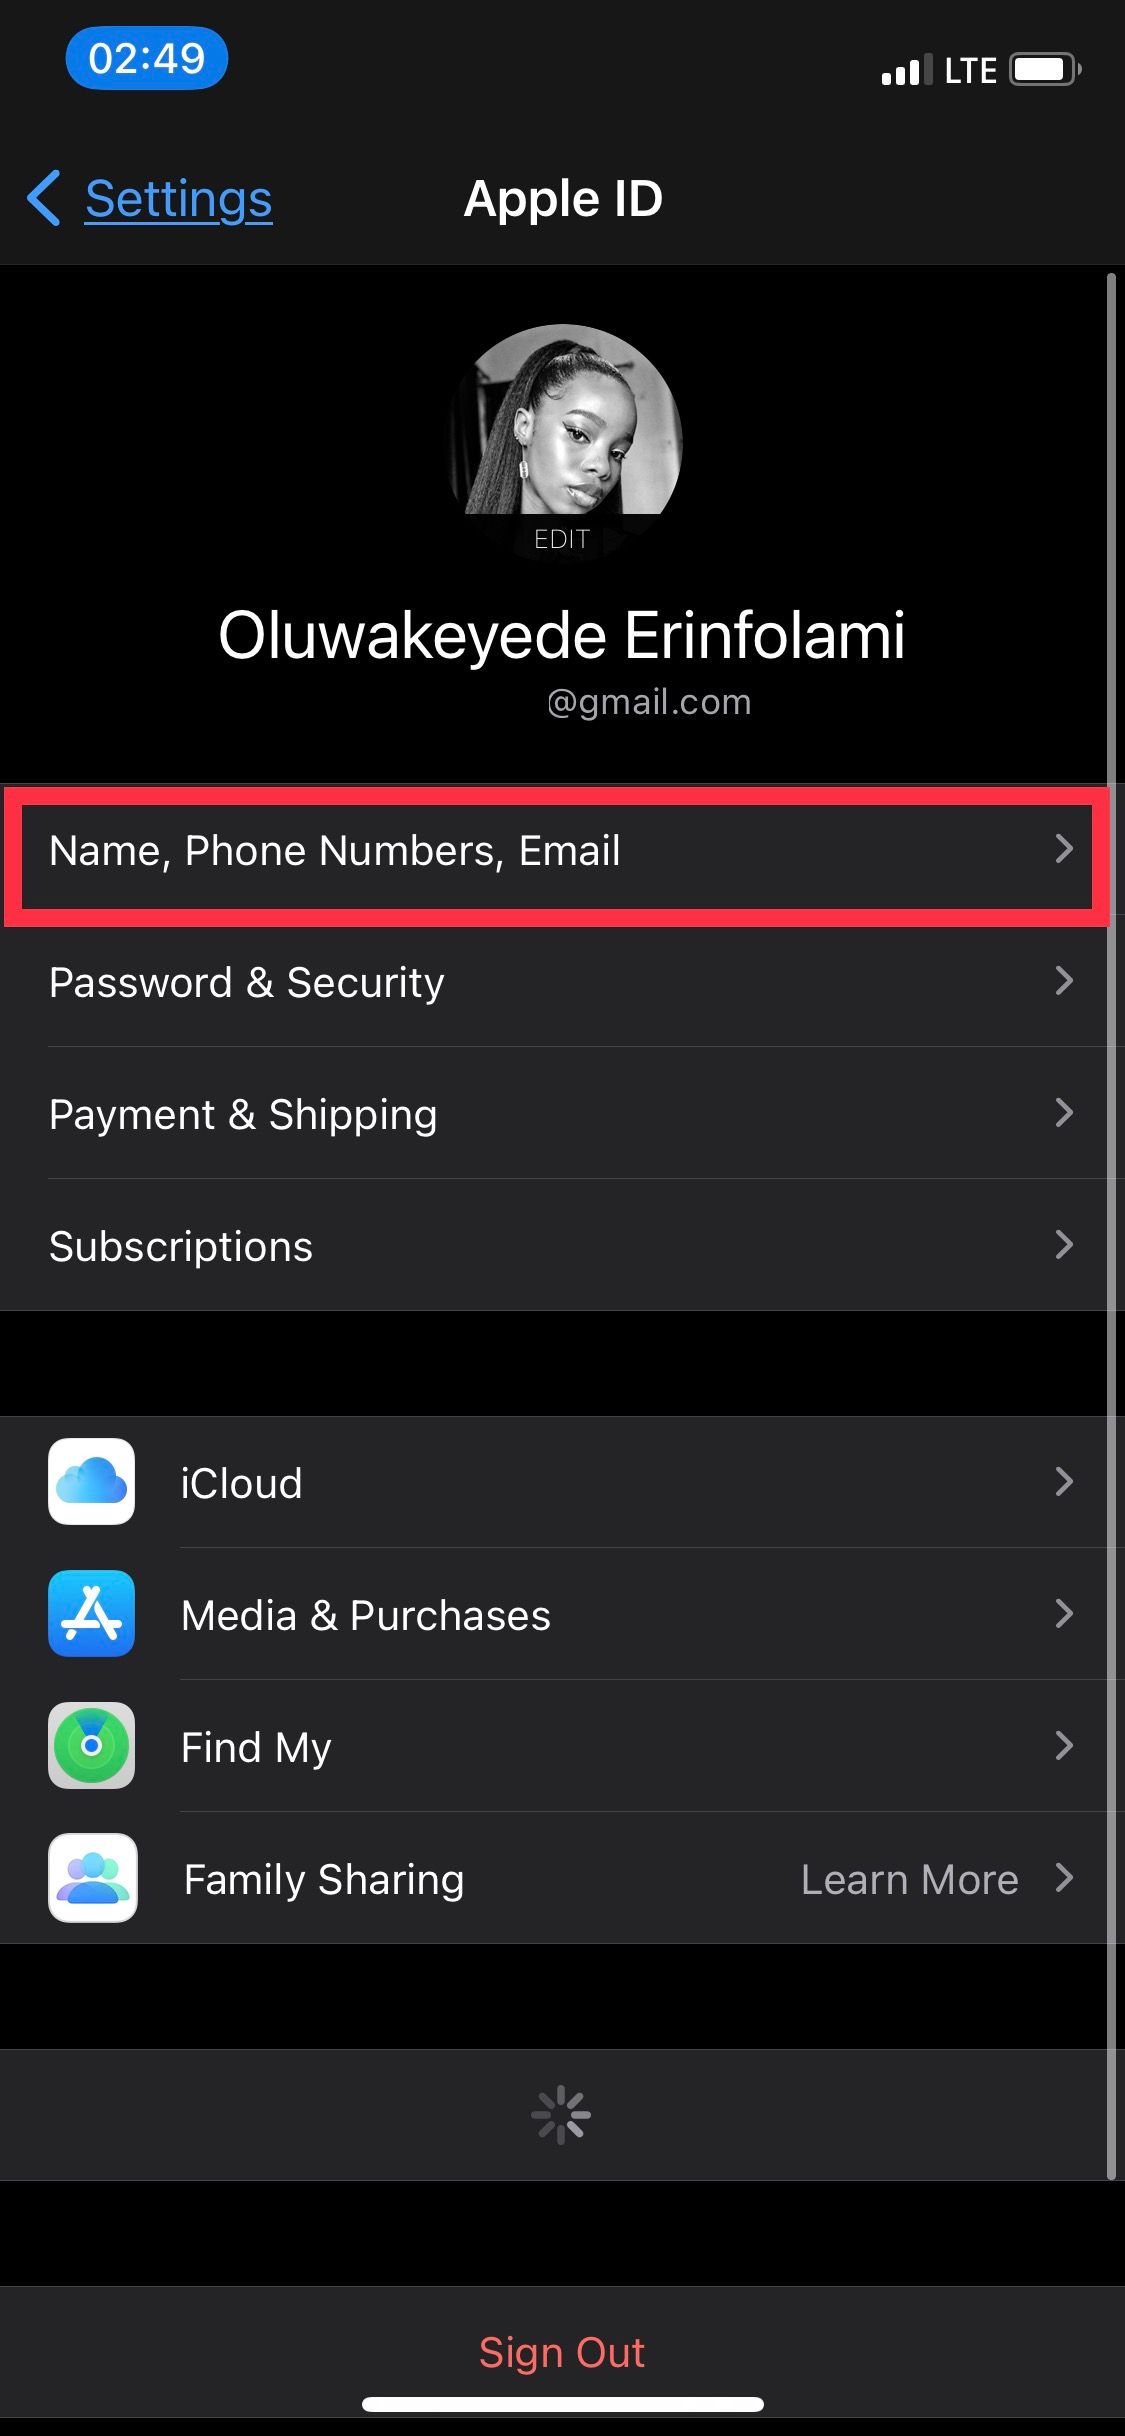
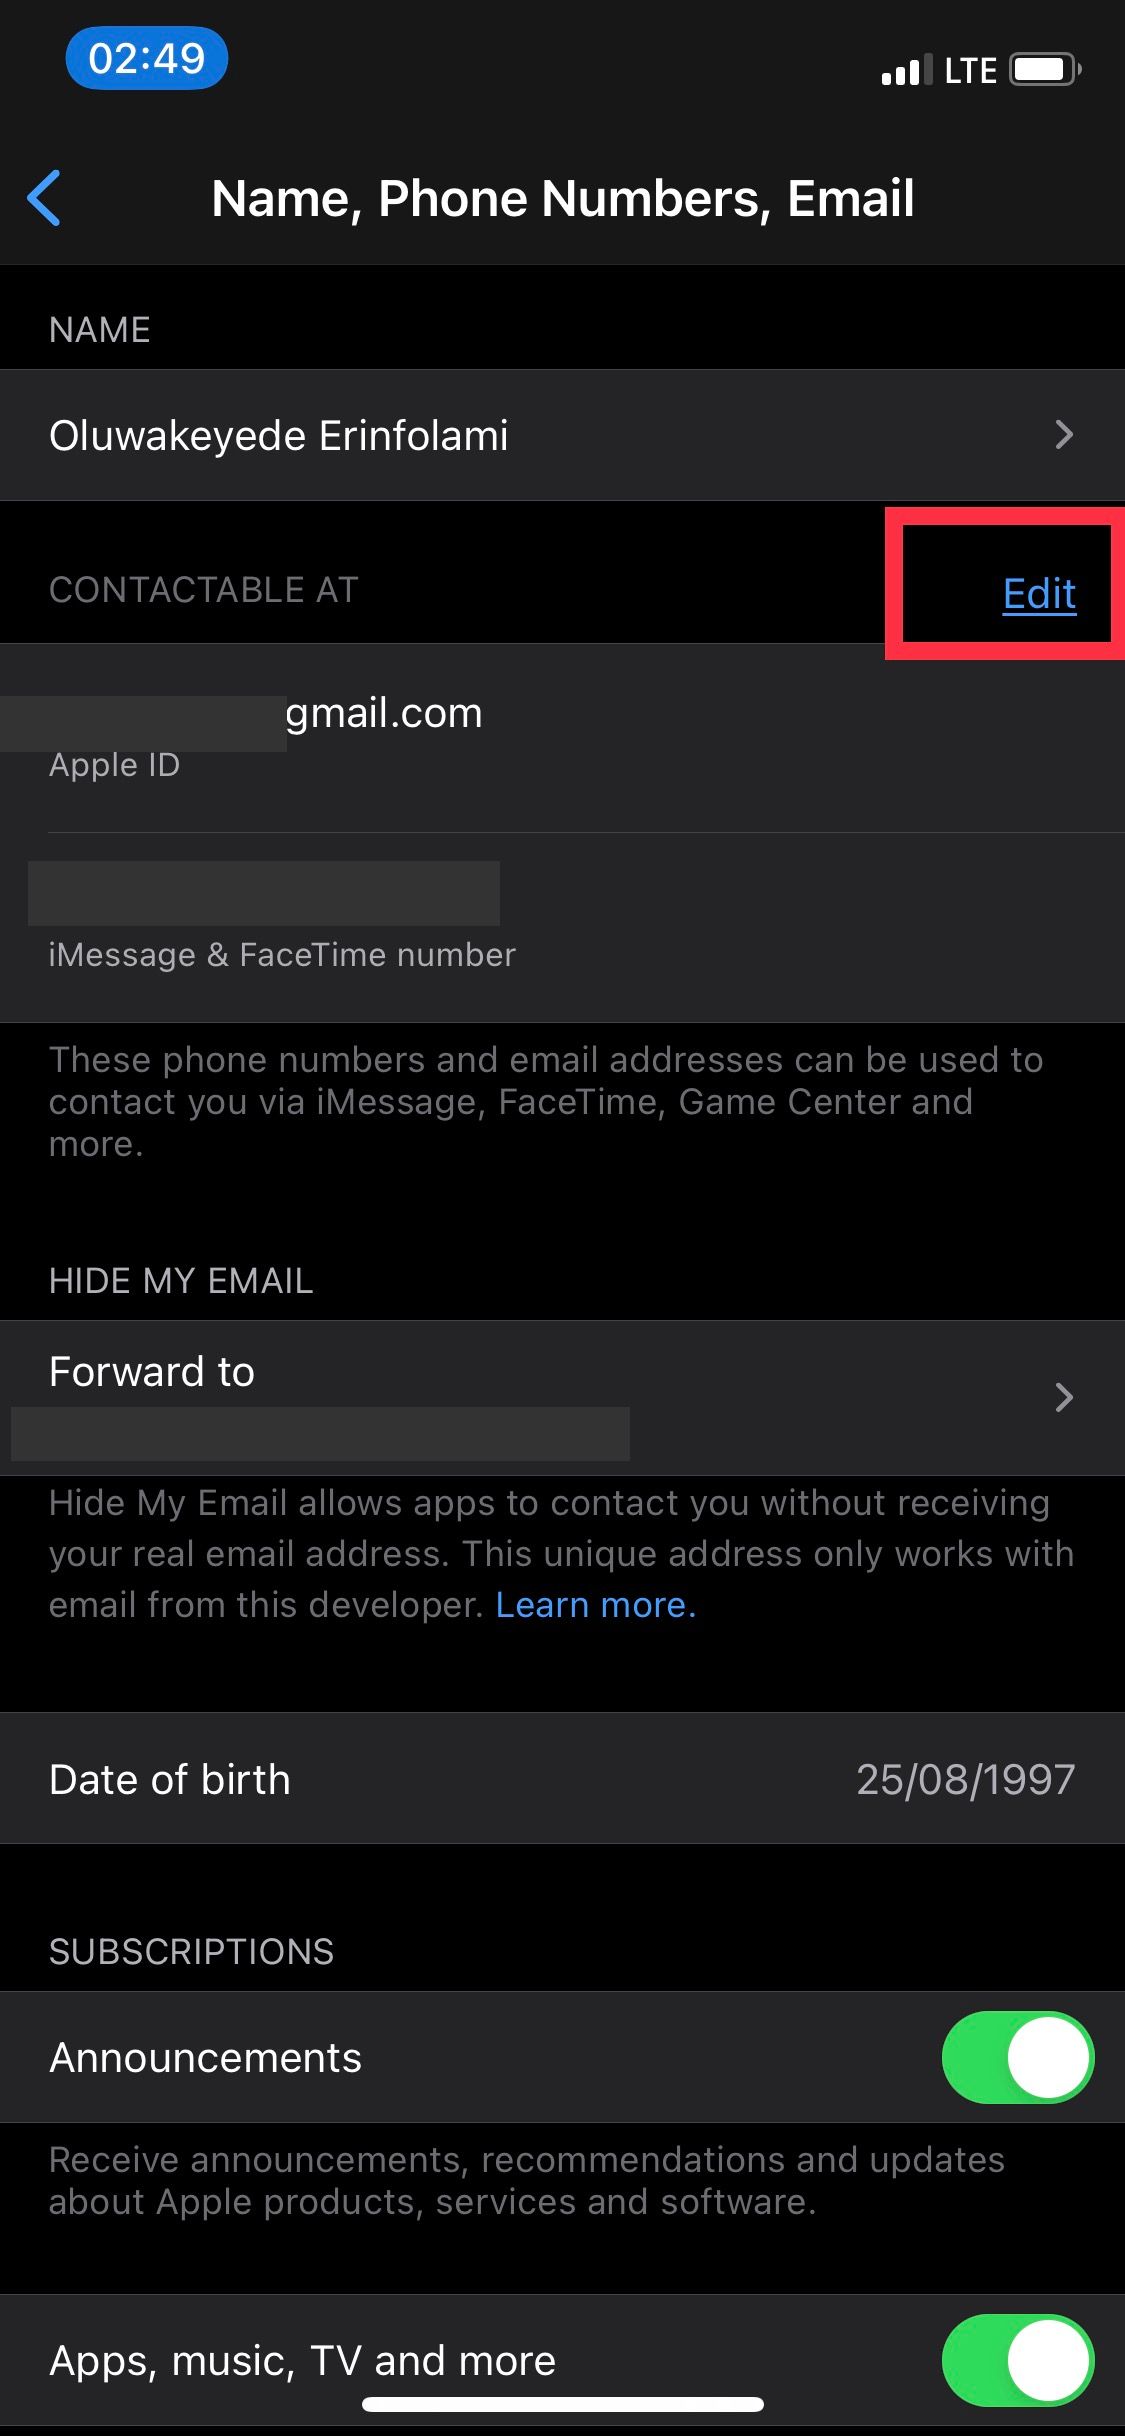
- Select your name at the top of the screen, then open the Name, Phone Numbers, Email section.
- Tap Edit from the Contactable At section.
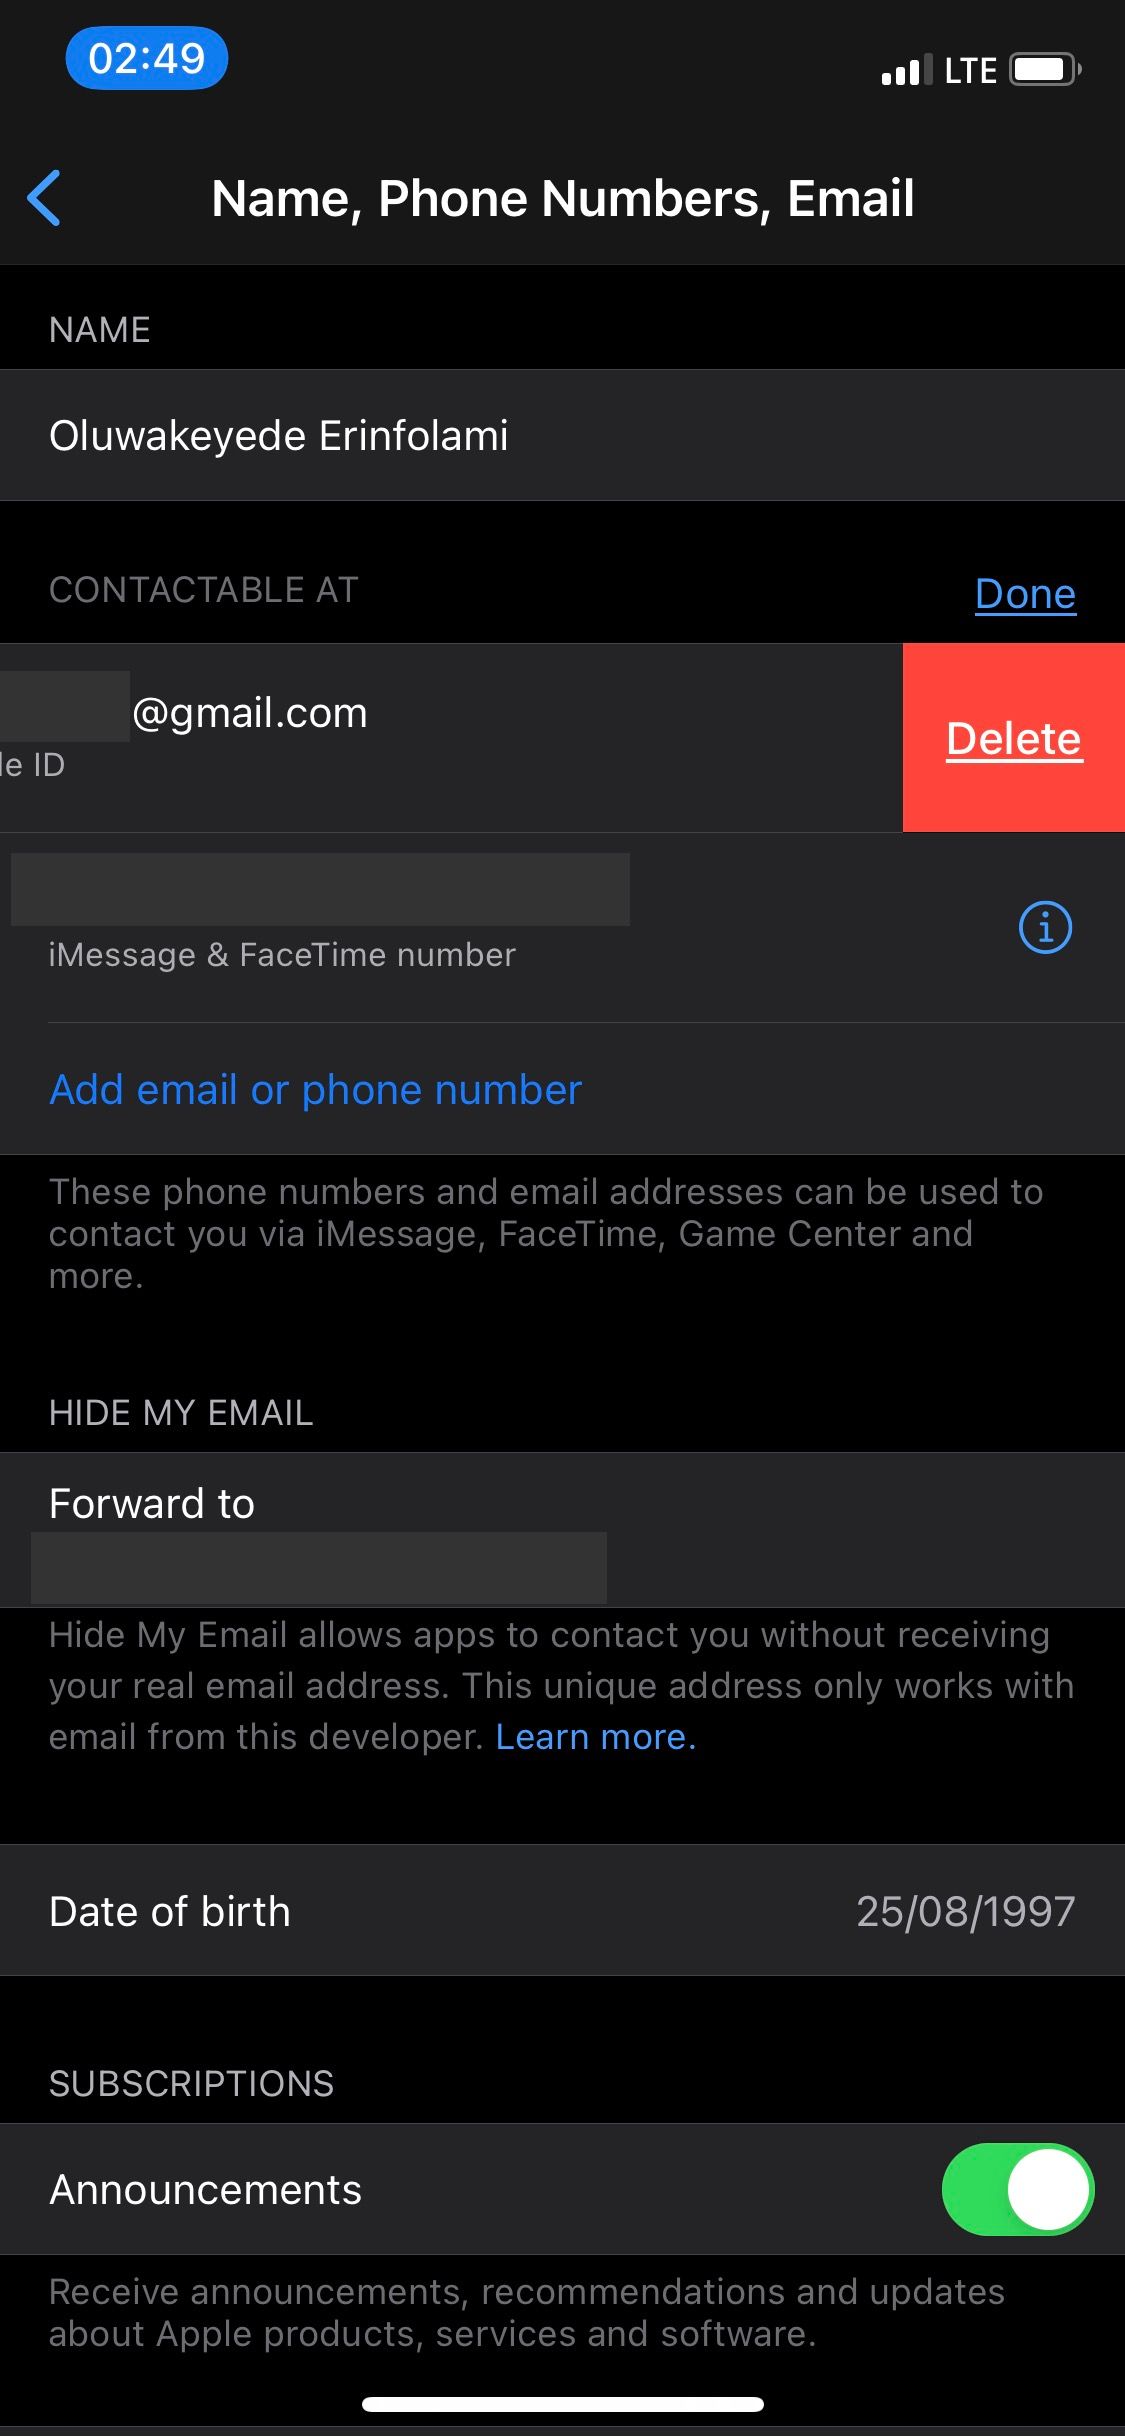
- Next, tap the red minus (–) icon next to your name, then Delete on the right side of the screen.
4 Images
- In the pop-up screen, select Continue to verify you want to remove your existing email and add a new one.
- Enter the email address you want to use for your Apple ID on the new screen that appears.
- Verify your new address via the email Apple sends to your new Apple ID email address.
Ensure that you have a backup of your iPhone before beginning this procedure, or you may lose crucial data. You would need to update your sign-in details on all other devices.
Also Read: Next month, Microsoft Teams 2.0 Will Reportedly Be Faster.
How to Change Your Apple ID Email on Your Mac
After changing the email address associated with your Apple ID, you must update your sign-in information on all other devices. If you were previously logged in to iCloud on your Mac, you should now use your new Apple ID email to sign in to iCloud to avoid issues such as iCloud not syncing. This is how:
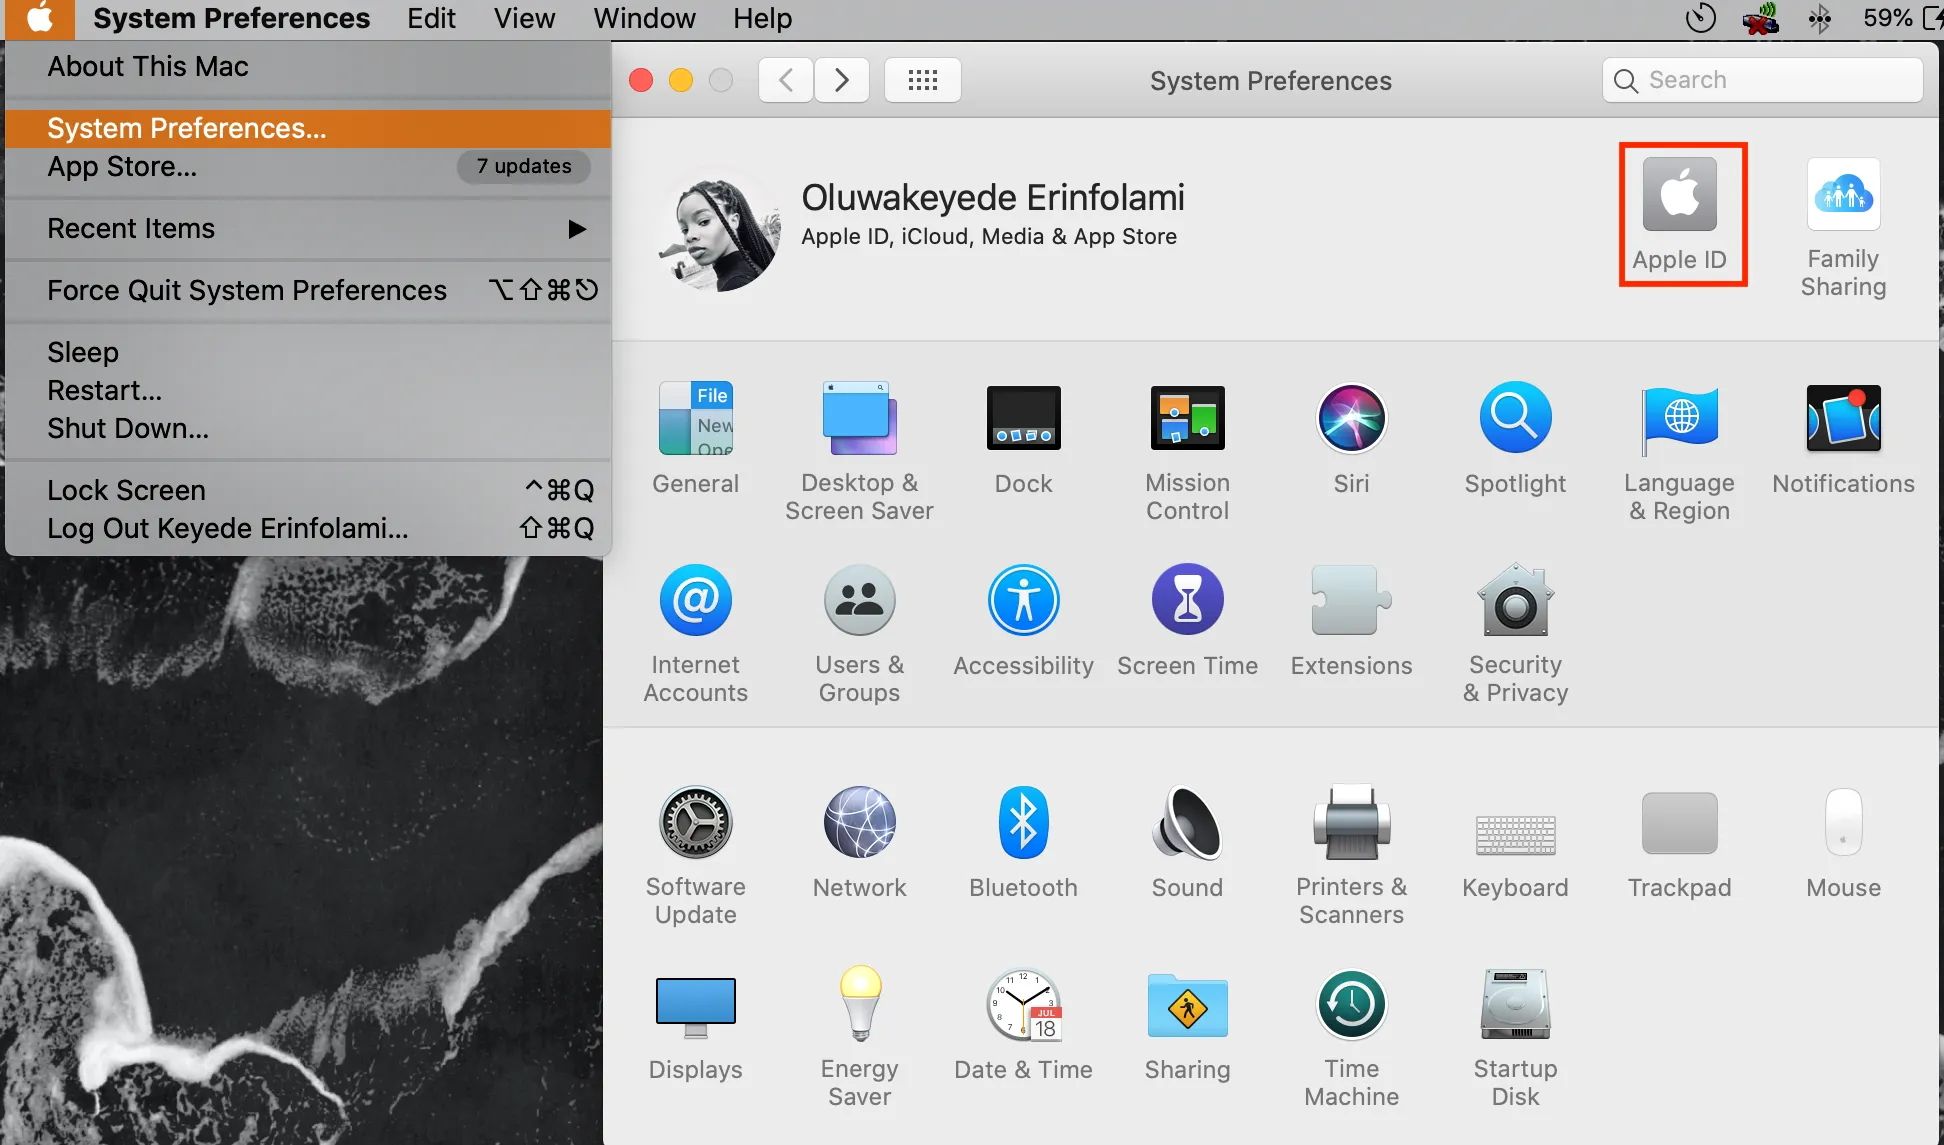
- Click on the Apple icon in the menu bar, then select System Preferences and choose Apple ID.
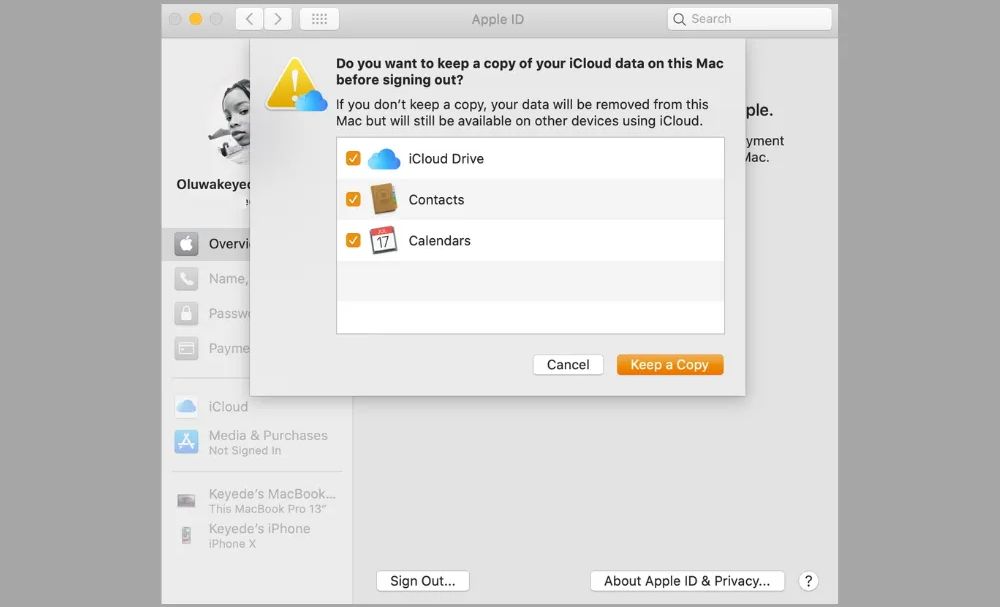
- Click Sign Out, then select Keep a copy from the pop-up dialog box to have your device save a copy of your iCloud data.
- Enter your Apple ID password when prompted, and you’ll be signed out of iCloud on your Mac. You might have to wait a minute for the sign-out process to complete.
- Enter your new Apple ID email address and password at the login prompt, then enter your Mac’s password. Click Next, and you should be signed in again.
Connect to Apple Services With Your Apple ID
Your Apple ID provides access to all of Apple’s services, including Apple Music, Apple Arcade, and Apple TV+. Without an Apple ID, you cannot make the most of the Apple ecosystem.
Thus, if you continue to experience issues with updating your Apple ID email, please contact Apple Help for assistance.
