Unless you operate completely in a studio, you will likely need to correct poor lighting at some time in your photographic career.
Not to fret, however. You will find eight recommendations in this post to assist you with your lighting issues, whether they are caused by flare, harsh shadows, or anything else.
9 Tips for Fixing Bad Lighting in Photos
1. Use Editing Software
Best Software for Fixing Bad Lighting: Luminar Neo
Despite the fact that we should attempt to get things correct in camera, there are occasions when you must simply grab the shot… This may need capturing photos in poor lighting.
Relight AI, part of the photo-editing programme Luminar Neo, is available for download here. It is a fantastic tool that may be used in such situations.
In addition to Neo’s other features, the Relight AI tool allows you to add natural lighting effects to an image with a few clicks of a slider in post-production.
AI generates a 3D map of your topic, allowing you to independently control the near and far brightness with astounding results. There is also a Depth slider that allows for optimal lighting adjustments.
How to Fix Bad Lighting in Photoshop
When you open a raw format file in Photoshop, Adobe Camera Raw opens first (ACR). Therefore, if you have a raw file, you should attempt to recover as many details as possible before using Photoshop.
Whether you began the process in ACR or not, once you’re in Photoshop you can work in layers to make nondestructive local edits.
You may alter the white balance by adding a Curves layer and using the eyedropper tools. Then, add a Hue/Saturation adjustment layer to the photo to perform the HSL modifications.
Add a Curves adjustment layer to brighten the image for local tweaks, then invert the layer mask to hide this alteration.
Using the brush tool, begin to whiten the areas that require illumination. Then, repeat the process with an image-darkening Curves adjustment layer.
If the background is too light, you may add a faint vignette effect. This will direct attention to the primary topic.
Hold down the Alt key and click the eye icon adjacent to the background layer to compare the final image to the original.
How to Fix Bad Lighting in Lightroom
To correct poor lighting with Adobe Lightroom, begin with fundamental modifications. The Whites slider regulates the white point’s brightness, while the Blacks slider controls the black point. Adjust them both to prevent clipping.
Then, use the sliders for Highlights and Shadows to restore as much information as feasible. These modifications can also be made using the tone curve. Create a simple S curve as a starting point, and then fine-tune it for your individual photograph.
Back in the Basic panel, you can use the Contrast slider to boost the contrast, as you likely lost a significant amount of detail in the highlights and shadows when attempting to recover them. In addition, utilise the Dehaze slider to boost contrast and colour saturation if the image appears flat owing to flare and haze.
Using a slight radial filter, you can create a vignette if you deem it essential.
If the image has a colour cast, you can adjust the white balance by using the eyedropper tool and clicking on a known white or neutral area of the image. Otherwise, alter the colour temperature using the slider.
You can also utilise lighting-based Adobe Lightroom presets to correct poor lighting. See additional details here.
Also Read: Launch of Super Mario Bros. Movie Plumbing Commercial and Website
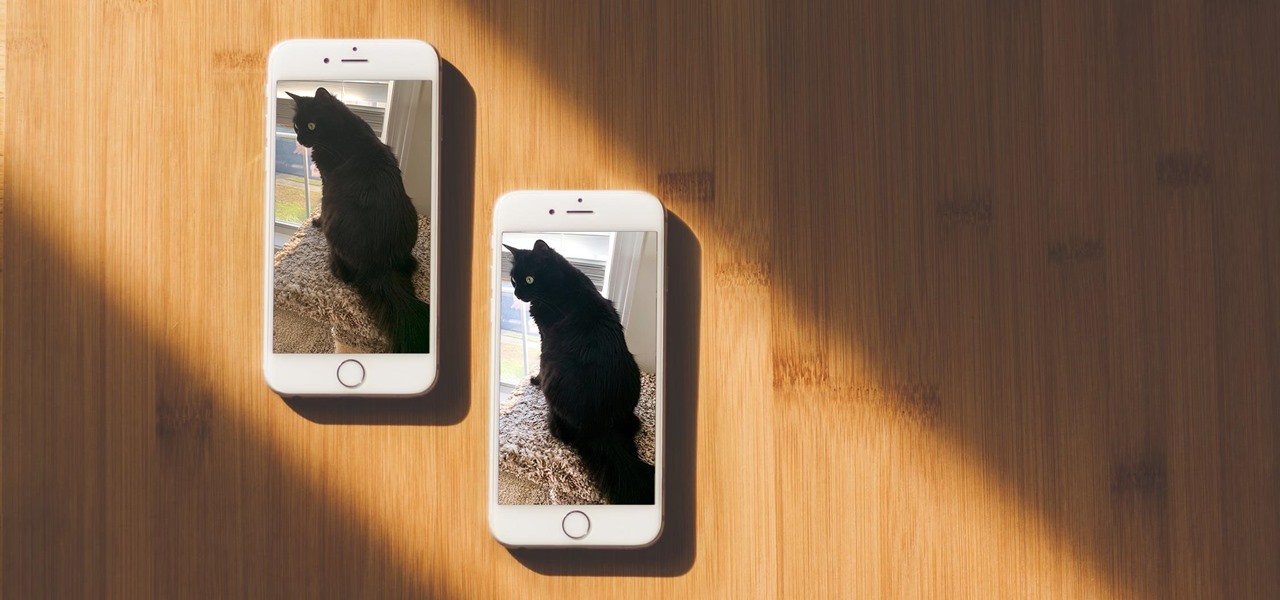
How to Fix Bad Lighting in an iPhone Photo
You can correct poor lighting on your iPhone with the Auto Enhancement function in the Photos app.
Simply open the desired image and tap Edit (upper right corner). Then, tap the wand symbol to activate Auto Enhance. Swipe to adjust the volume, and when you’re pleased, click Done.
You can manually adjust the lighting using the Exposure, Brightness, Saturation, and White Balance tools, if necessary.
How to Fix a Photo that is too bright on iPhone
Simply launch the Photos app on your iPhone and tap the overexposed image (this is known as an overexposed photo). At the bottom of the display should be a button resembling a dial; tap it, select the Light tab, and then select the Brightness option.
Pull the slider backwards to darken the image; moving it in the opposite direction will brighten it.
2. Use Your Camera in Manual Mode
While the auto modes of current cameras are capable of incredible feats, they frequently fail to expose images accurately when the available light is less than ideal.
To begin with, you can alter the exposure mode to obtain a more precise reading of the available light. Additionally, you can establish a custom white balance.
Then, you may adjust the exposure settings such as shutter speed, ISO, and aperture to brighten or darken the image based on what you’re trying to achieve and the results you’re receiving – regardless of what the camera considers to be the “proper” exposure.
This procedure can help you obtain better outcomes; if not exactly what you need, at least you will have more data to work with in post-production.
3. Expose for the Highlights
This theory from film photography still applies to digital photography: expose for the highlights and develop the shadows.
This is because it is difficult, if not impossible, to recover too much light in the darkroom or, in this case, during the editing process. On the other side, the noise within the dark shadows is not as troublesome.
You will have a photograph with high contrast. Utilize the procedures outlined in the first tip of the article with the software of your choosing to obtain additional information.
Also Read: Opera is Integrating ChatGPT for website and Article Summaries.
4. Use Exposure Bracketing and HDR
HDR, which stands for High Dynamic Range, is a method that can be used when there is no way to take the perfect photo. Essentially, it combines multiple photographs with varied exposures into a single, detailed image.
For identical framing, a tripod is required; otherwise, the photos would not align. Then, take a photo with well-exposed highlights, one with well-exposed midtones, and one with well-exposed shadows (this is called exposure bracketing).
Afterward, combine the three photographs using photo editing software. There are specialised tools, such as Aurora HDR, that provide a great degree of customization, but you can also do it with Photoshop or GIMP.
Also, several cameras and the majority of smartphones can automatically capture HDR photographs. Just be aware that you have no control over the final image using this method.
5. Use Shadows Creatively
If your poor lighting is caused by really intense shadows, try to incorporate them into a creative composition. Change the camera’s angle, for instance, to place them more effectively.
Keep in mind that you can employ extended shadows to create depth or to add a sense of mystery to your photograph. You can cause them to interact with your subject or even become the subject of your photograph.
7. Use a Fill Flash
When shadows are too intense for creative photography, a fill flash might be used. This will, for instance, soften the subject’s facial features in a portrait.
Since the flash output is not as intense as the sun, you may wish to enable high-speed sync to increase the contrast between the foreground and background.
View the video above for a step-by-step guide to taking photographs with a fill flash and correcting poor lighting.
8. Use the Right Camera Gear
Sometimes there is little we can do to improve the illumination, but there are accessories that can be used to compensate.
A lens helmet can aid in preventing lens flare from spoiling a photograph. In addition, a polarising filter helps eliminate glare and undesirable reflections. Additionally, it darkens the image if there is too much light.
When the scene is too bright, neutral density filters are also helpful.
The density of a graded ND filter drops on one side of the lens, as you might expect. This type of filter is useful when there is a lot of contrast in your image, such as when photographing a landscape with a very bright sky and a considerably darker foreground.
Also Read: Microsoft Launches AI-Powered Search, “Binging” In The Next Generation Of The Internet
9. Change the Position of the Subject
If you are photographing landscapes or buildings, you must find a solution around poor
lighting. But if you can change the subject, you can discover a solution to the problem.
Examine the scene’s lighting to determine the source of the problem. Does the sun cause flares? Then, relocate your subject to prevent the sun from striking your lens. Is the brightness too intense? Move the subject into the shade to improve photographs.
Final Words
With any luck, these ideas will assist you in capturing the greatest photo possible, regardless of the lighting conditions.
Have you ever encountered a difficult circumstance? How did you conquer it? Please share your experiences in the comments; we’d love to hear them.
